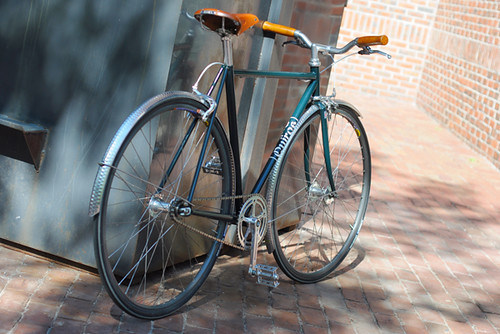
 Spare bicycle parts, a restless spirit, and a willing "guinea pig" can make for a dangerous combination. In her latest reincarnation, Marianne sports VO Belleville handlebars and Dia Compe inverse brake levers - a practice run to determine how a similar set-up would feel on the Royal H. mixte.
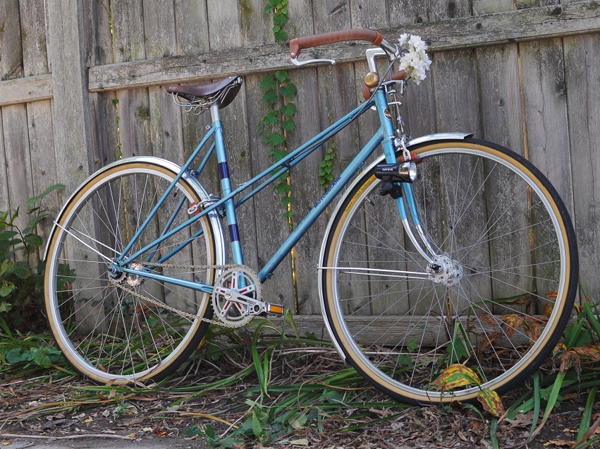 Here are the bars and levers in all of their French glory - on a Motobecane mixte with an Ideale saddle.
  The Belleville handlebars are similar to the Porteur handlebars shown here. Both are a classic style of upright bars found on vintage French city bicycles. These bars are narrow, with long gripping areas that are nearly parallel to each other - placing the rider's hands in a position similar to holding a tray. The Bellevilles are 5cm narrower than the Porteurs (43cm vs 48cm) and are completely straight across the front (whereas the Porteurs have a slight forward sweep).
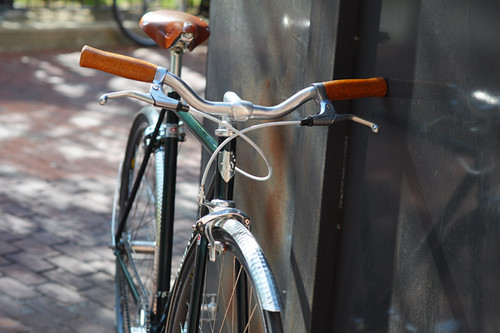
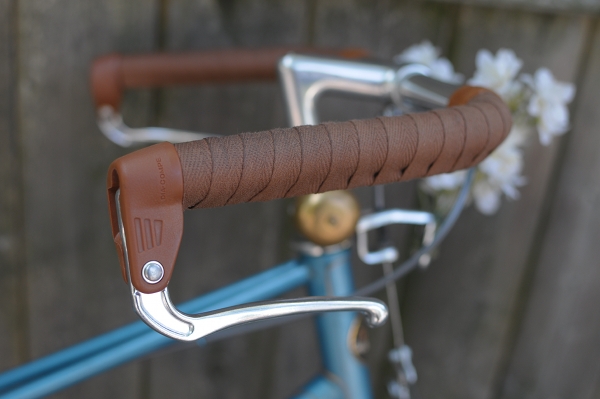 It is typical to see handlebars like this fitted with inverse brake levers. My assumption is that this is done to maximise the gripping area of the bars. Because the levers are installed at the ends, there are no interruptions along the handlebar's surface and the cyclist is free to move their hands pretty much along the entire bar.
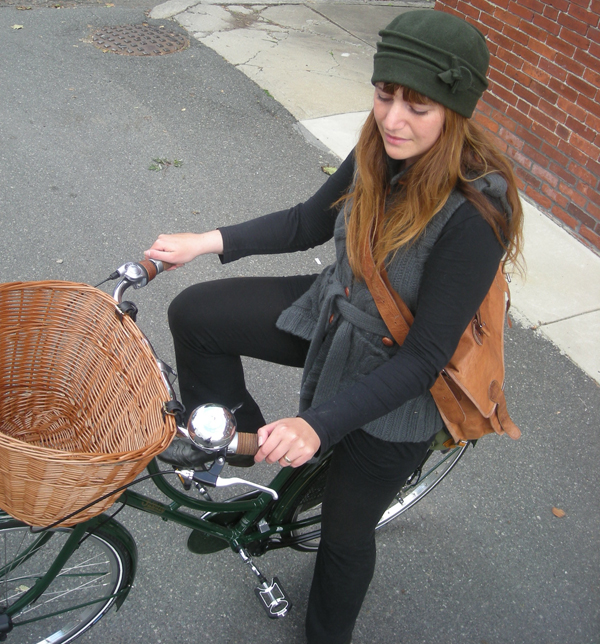
 The inverse brake levers you will find today are most likely either Tektro or Dia Compe. Here I have installed the latter, and you can see that their brown rubbery tips go nicely with twined handlebars. It surprised me to learn that some dislike the Dia Compes because of the brown tips and prefer the Tektro levers instead - which are all-metal. To me, the rubbery surface felt nice, but I suppose it isa matter of personal preference. If you have used either of these levers, I'd like to hear your thoughts.
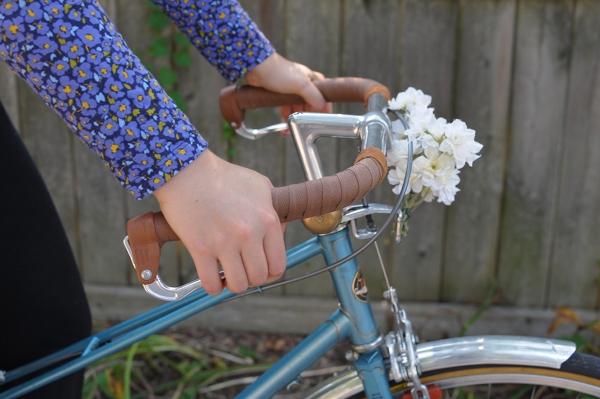 Braking with inverse levers. I have found that I am able to get pretty good leverage almost no matter where I hold my hand along the bar, with the exception of the very front.
 Can't brake from here, near the corners. But if I move my hands 1-2 inches back, it will work. This set-up is amazingly versatile in terms of the hand positions it allows.
 The inverse levers are set back from the bars far enough so that they do not interfere with the grip. You can see in the pictures that they are nowhere near my knuckles. Truly a neat design.
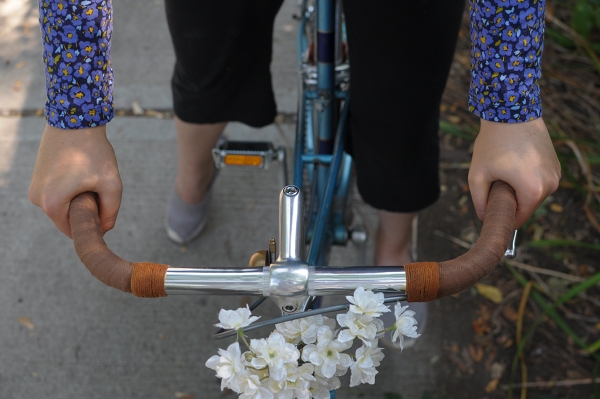 If you are curious about this type of French set up, both the bars and the levers are surprisingly inexpensive. You will like them if you are a fan of narrow handlebars, and if you prefer to hold your hands to the sides rather than flared out or straight in front of you. I certainly fit that description, so both the Belleville and the Porteur handlebars feel as if they were made just for me. The super-wide Albatross bars were comfortable enough, but with the Bellevilles and the Porteurs I get that "spot on!" feeling. I also think that they are better match for French bicycles - especially for the Motobecane's aggressive handling.
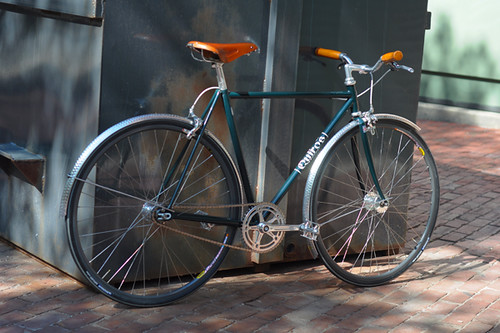
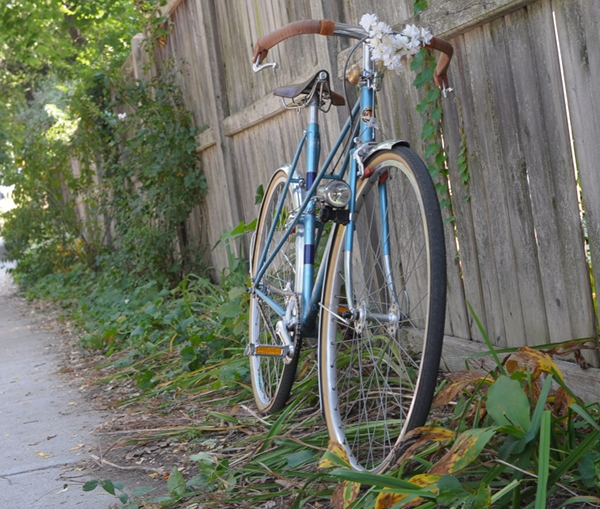 I will pause and confess here, that this is the last change I will be making to Marianne...because she no longer belongs to me. Yes, I did sell her after all - to a lovely local woman whose acquaintance I had the pleasure of making this morning. Riding the Motobecane with the French handlebars and inverse levers yesterday, I finally felt that this bicycle was "perfect" and experienced a calm sense of satisfaction - not dissimilar to how I feel when a painting is finally "finished" or when a photograph looks just right. And after that, it finally felt appropriate to let her go. I hope the new owner enjoys her as much as I hope to enjoy my Royal H. mixte - which I will most definitely fit with a similar handlebar set-up.
Oh - and if anybody wants some
 There are basically two options for transporting your belongings while cycling: (1) on your person in a backpack or messenger bag, or (2) in a contraption attached to the bicycle itself, such as a basket, pannier, saddlebag, or other fixture. When it comes to most of my belongings, the choice on this is clear: I would rather not carry anything on my back while cycling, especially since my bicycles are fitted with racks and have great transport capacity. But when it comes to my laptop (a large MacBookPro), I just can't seem to "let go" and trust it to the care of a bicycle. I carry it either in the large leather satchel in the photo above, or in the Chrome messenger bag pictured below. The leather satchel is more suitable to my personal style, but the Chrome bag is more ergonomic and feels better on longer rides. Between the two of them, I have pretty much gotten accustomed to carrying my laptop on my back while cycling, even for long stretches.
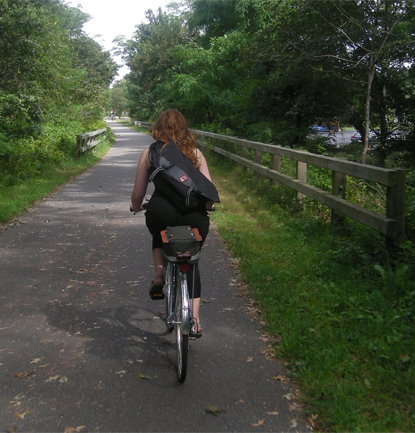 Still, I am plagued with the question of why I do this, when my bicycles are rated to handle the weight and could make my life so much easier in this respect. There are panniers specifically designed for laptop transport and sturdy wire baskets for the rear rack that will safely do the job as well. Some even strap laptop bags directly to their racks with bungee cords, and some make their own panniers out of handsome vintage satchels using Arkel or Ortlieb attachments. So I suppose for me, it is really an issue of trust and control: Somehow it feels that the laptop is safer with me than attached to the bicycle. I have browsed countless times through all the panniers in the local bike shops, but ultimately I just can't imagine myself cycling with my laptop dangling over my rear wheel and out of my field of vision. Instead of watching the road and enjoying the ride, I'd be thinking about my laptop.
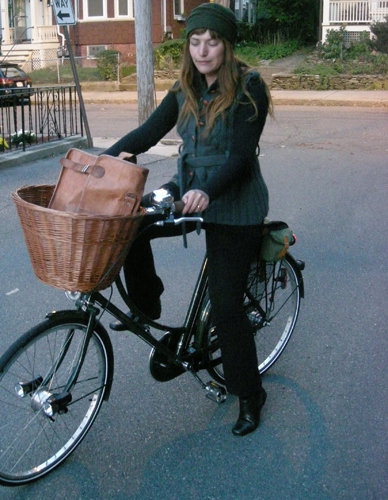 In the end, taking the first step towards trusting my bicycle with my laptop ended up being simpler than I thought. As it turns out, my leather satchel fits quite comfortably into the front basket on my Pashley, and the edges get lodged in the wicker, so that the bag remains sturdy when the bicycle is in motion. It never occurred to me that this could be a possibility, because I assumed that the satchel would be much too large for the basket and also that it would bounce. But there you have it. I am pleasantly surprised that there are no bouncing issues: Once stuck in the basket, the satchel does not budge; the wicker sort of closes in on it and holds it firmly in place. I feel comfortable with this set-up, because I see the bag in front of me at all times and know that it is doing okay. Not sure whether this will be my permanent method of transportation from now on, but it worked splendidly for some errands close to home.


 A little while ago I locked up my bike in a neighbourhood I don't much like and left it there for a couple of hours. When I returned, there were objects arranged on my rear rack: an unfinished cup of coffee and a pair of broken sunglasses. I picked up the paper cup gingerly and threw it in the nearby trash. There was a stain and some crumbs stuck to the cup where someone's mouth had been. The cup was cold, but then the day was also cold; impossible to know how long ago the coffee drinker had left it there. I then looked at just the sunglasses alone on the rack. Reflective and cracked in several places, they reminded me of broken mirrors that could bring bad luck -I found myself not wanting to touch them, and just stood there looking at them for a bit. Finally I removed them from the rack and placed them carefully on the edge of a flower bed.


 More information on Elephant Seals.


 In all the pack is very simple. Butit is the detailing and attention to details when it is being sewn thatmakes the pack so awesome for my own use. The internal pocket for a bit of food or gel and a head lamp as an example, the extra thick, full size shoulder straps, the easily accessed and manipulated haul loop, the clean design when you need to haul, the easy extendable or removable lid, the small unpadded wings to give extra support on the hip belt when needed with heavier loads.