 |
| The footpath sign is just by the churchyard gate |
We started from Braunston church, which we should have looked at a little more closely. - Confession time - we visited Braunston next day, took some better pics, and went for lunch in The Old Plough. A baguette with filling, salad with dressing and coleslaw for £6.25.
Though the interior is interesting, the most intriguing feature of All Saints is outside. Go around the side of the west tower and there you will find an roughly carved statue, about 3 feet high, depicting a grinning figure. The reverse of the figure is flat, and it was used for many years to form a step, so the carving was only discovered when the step was taken up.
No one knows how old the carving is, or what it is supposed to represent, but it is almost certainly pre-Christian. It may be a symbol of an ancient fertility cult, or some form of Celtic Earth Mother. Whatever it is supposed to represent, it is a quite extraordinary bit of primitive sculpture, and deserves more recognition.
More discussion on this stone carvingand more info about the church and carving.
 |
| According to the info board she is supposed to ward off evil spirits. |

We walked through the churchyard to take the footpath going west. After a couple of fields the path crosses the young river Gwash, and turns south-west. It followed field edges climbing gradually , with clear way markers until we came to a field of long grass where we followed our noses and the map, diagonally upwards to the opposite corner. In fact we veered slightly to our left, but rejoined our route after going through a gate at the top of the field.
 |
| Checking grid reference and map |
We followed a wide bridleway east along the top of the ridge, until we reached a junction where we turned right. We walked downhill to and through a strip of muddy woodland. At the edge of this we turned left uphill along what looked like a wet and muddy track, but in fact it was reasonable for walking. The path met another track and we turned right and downhill for a short distance, before turning left again, following a bridleway to a junction of ways, where we stopped for a break, just after the three-mile point.
We continued walking straight on ( east) as far as Leigh Lodge. There we turned left (north-east) and followed the route of the Macmillan and Leighfield Ways, up a metalled road, for about a mile. When we reached the minor road to Braunston we turned left (north-west).
The original plan was to take a bridleway on our right, and follow the river Gwash to Braunston via the sewage works and the bridge pictured below. As it promised to be a mud-bath, we took the road instead.
 |
| Braunston |
 |
| All Saints church, Braunston |
 |
| Drawing of All Saints church by Harry Hamill |
The walk touches/overlaps with these two previous walks - this onefrom Nov 28 , and this one from July 21 .
 I have talked ad nauseum about my Carradice Barley bag, and so I thought it was time to review my other bag, the Sackville Trunksack. As far as I know, it is available exclusively from Rivendell, and you can read their product description here.
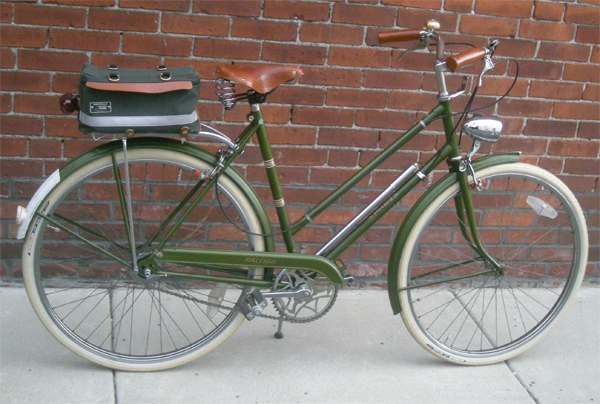
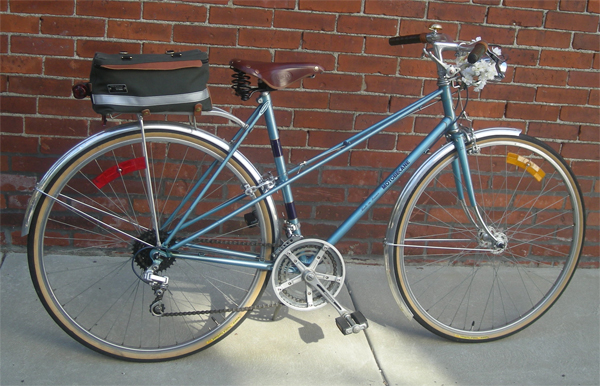 The Sackville Trunksack is a handsome box-shaped bag, in a dark-olive waterproof canvas with golden-brown leather trim and brass hardware. The large size is designed for the rear rack. It fits Pletscher-style racks perfectly, neither leaving portions of the rack uncovered, nor overhanging from any part of the rack. It looks great on many different types of bicycles, including the Motobecane mixte above and the Raleigh Lady's Sport on the first photo.
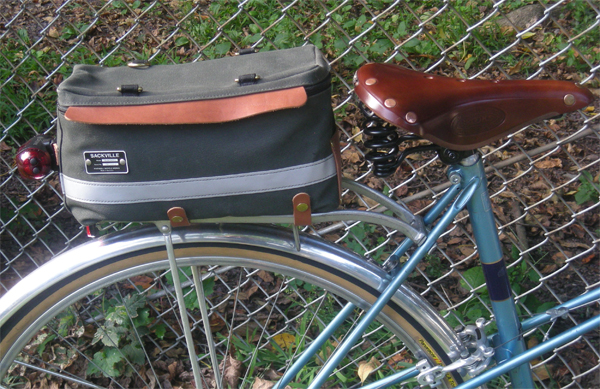 Here are some views of the bag. The zipper closure with two separate zippers is very convenient, as it allows you to open and close the bag from any side while remaining seated on the bicycle.
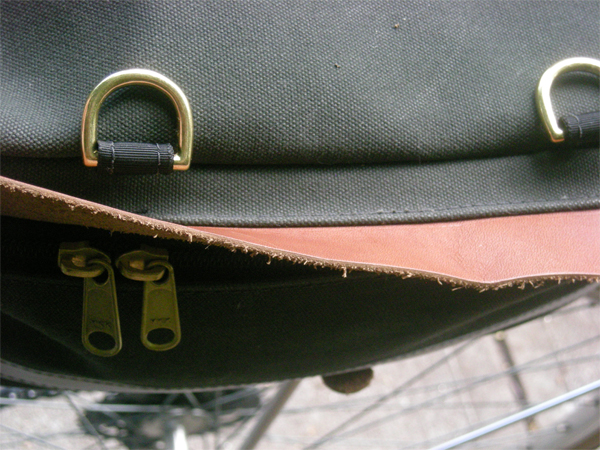 The leather flaps hide the zippers from view and prevent rain from entering.
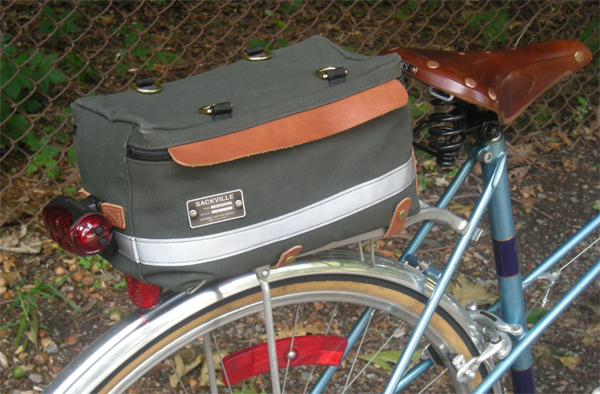 3/4 view. The colour of the leather flap is an exact match for Brooks "honey" (pictured ont he 1st photo of the Raleigh here) and a shade lighter than the Brooks "brown" (above). The reflective strip is an extra benefit.
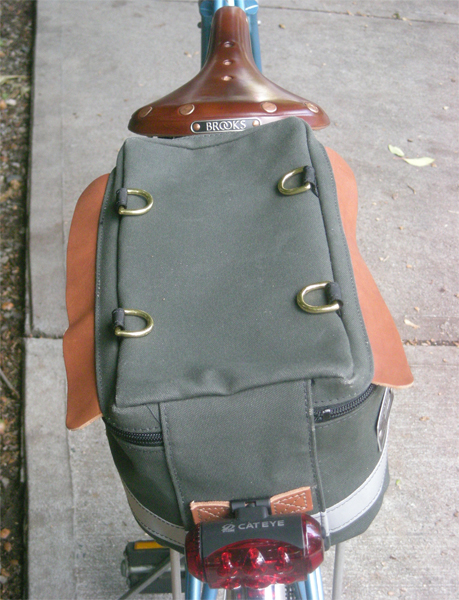 Rear view. The leather strap in the back is positioned perfectly for mounting a light, providing a great solution for rear lighting (if you recall, this was my only criticism of the Carradice Barley).
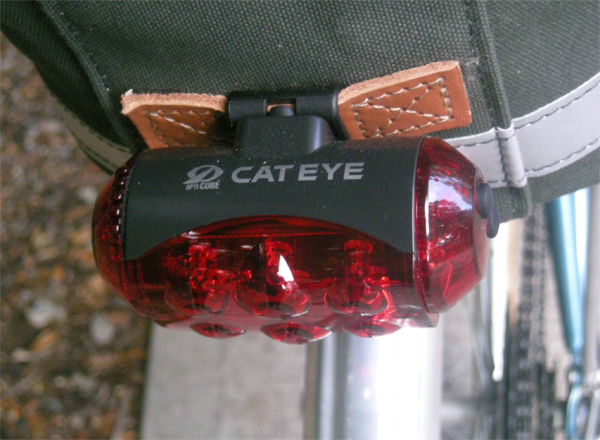 Close-up of the light attachment. Very secure; no wobbling or slanting even during very bumpy rides.
 The complete lack of wobble is one of the biggest benefits of the Sackville Trunksack. This is achieved by the tight and precise attachment system: leather straps with snap closure.
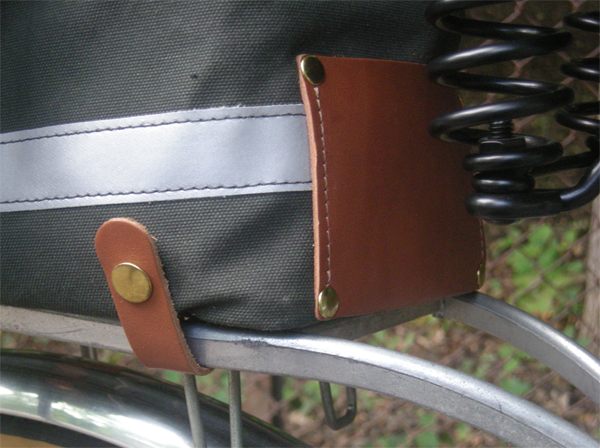 The brass hardware is rather attractive.
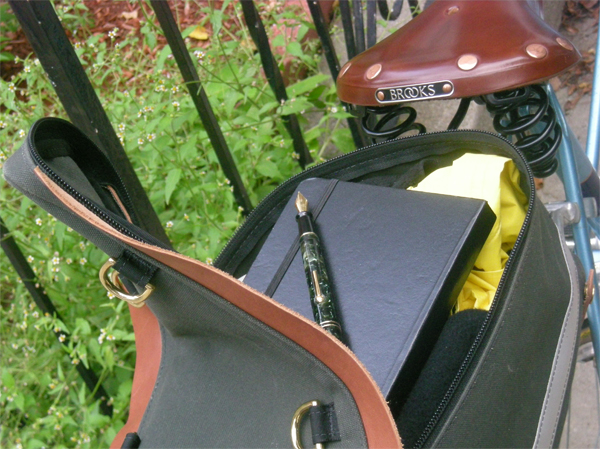 Inside, the Trunksack is like a large box or chest: There are no compartments. This can be both a good thing and a bad thing. It is good in the sense that you need only to open it once, and all of your stuff is immediately accessible. And it is bad in the sense that, especially if you are messy, your things will soon become jumbled due to the lack of compartments. For me, the benefits of the ease of access outweigh the drawbacks of the lack of compartments - but this is a personal preference.
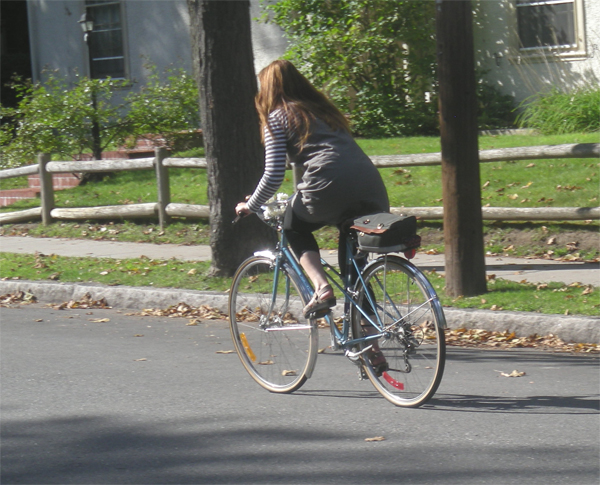 My one complaint about the Sackville Trunksack, is that it has no structural support and therefore does not retain its form unless it is full. You can see that almost all the photos show various degrees of sagging. We are trying to make a support for it either out of wire or plexiglass, but it is not yet complete. In the meantime, I try to keep it maximally filled.
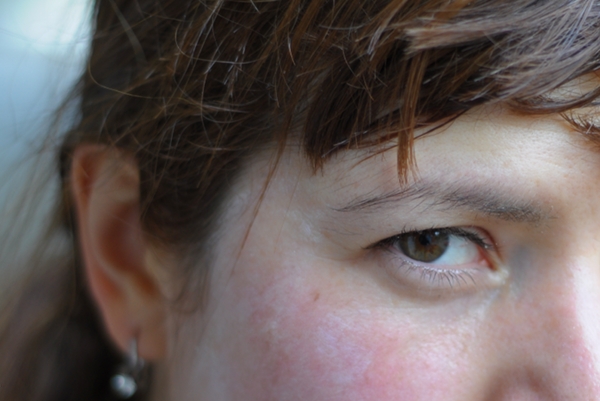 Though I have derived many benefits from cycling, the one drawback I am still struggling with is sun damage. During my first year on the bike as an adult, I thought that I was being pretty good about using sun protection, but noticed visible damage to my skin that seemed to be a direct result of cycling over the summer months. Darkened patches and wrinkles appeared in areas of my face and body that had been most exposed to the sun while cycling. And this was despite using high SPF sunblock and staying off the road during the hottest times of the day.


 Including bicycles in shop window displays seems to be the new thing, and some fashion designers are even making their own. Cynthia Rowley beach cruisers are now available for sale in her shops, including the one on Newbury Street in Boston.
 Cynthia Rowley clothing has a flirty, girly, 1950's-era feel to it, so the beach cruiser seems an appropriate complement. I wonder how many people out there are buying designer bicycles. The Rowley cruiser is certainly a more affordable alternative to the Fendi Abici!
 Ok, so that animal doesn't count in an official rescue way, because they are not part of the rescued animals. They are part of the experience though, because they are everywhere. There are some animals that I am a bit more fond of here too.
 This guy was not very big last year. If it is the same guy. He's huge now.
 These were not so close, but that's ok...I'd rather not be too close to the green gunk.
 This guy was annoyed that I woke him up from his nap. He was not amused. I was talking baby talk to him because I thought he was so handsome. Apparently panthers are not fond of baby talk. Who knew? I apologized and moved on quickly. I'm not sure what would posses me to talk baby talk to a wild animal anyways. Besides, I can relate because this is how I feel each and every morning.
  This was my favorite close encounter. This sweet guy was hanging in his rope hammock and peeked out to see me. I guess baby talk works on raccoons.
 Aric asked why someone would rescue raccoons. Good question. After seeing this sweet face though, I'd be tempted to. Well, if I didn't live in an RV with three cats, one dog and two teenage boys I would be tempted to. Glad I can visit them this way so I don't have to. Living the life in warmer Florida.