 [image vianiniferrose]
 In addition to the variety of comments posted on this website, I receive lots of questions from readers via email. And if I had to say what the one most frequently asked question is, it would be a variation of this one:
I am looking for a nice bicycle for commuting around town and my budget is $500. I would love to get a new Dutch bike or a Pashley, but I just can't afford it. What would you recommend in my price range?Now, I do have a page on this website called Budget Options, and a link to it is prominently displayed in the upper lefthand corner. On that page I keep an updated list of manufacturers that sell budget versions of classic bicycles for as little as $150. I also have a page on shopping for vintage bikes. So, in emailing me the above question, the reader is usually looking for more than to be directed to one these pages. They are looking for my opinion: What would I do with $500? What do I recommend of all the possible options?
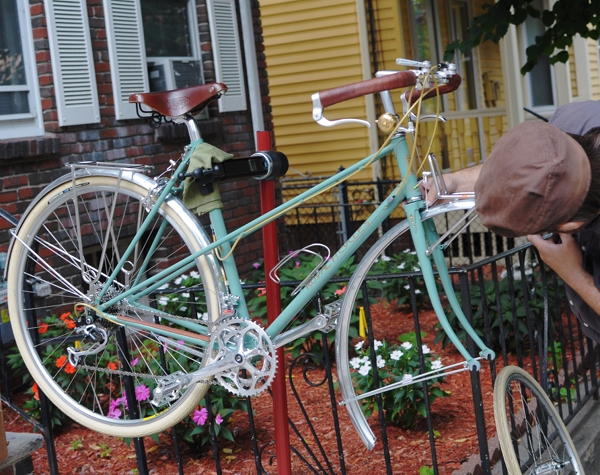
Okay, if you really want to know, I'll tell you. But I can almost guarantee that you won't like it and that you won't follow my recommendation. Do you want to hear it anyway? Well, all right. I would recommend buying a vintage 3-speed and spending the remainder of your budget on modernising it. Here is how I would do it:
 [image via Trisha Brink Design]
Step 1:
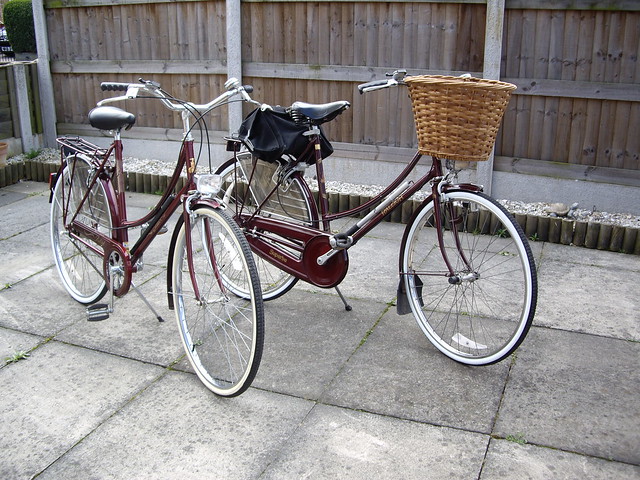
Buy a vintage Raleigh Lady Sports in your size and preferred colour. Make sure the frame is in good condition, and that as many components as possible are salvageable. Try to spend under $100 on this purchase, and absolutely no more than $150. It is possible if you do some research and ask around. Even if there is a shortage of vintage bikes in your area, post a "want to buy" ad on your local C-List and chances are someone will dig one out of their basement or barn. Or join bikeforums and a kind enthusiastic soul on the Classic & Vintage subforum will provide you with some local contacts. It can be done if you are motivated.
Step 2:
Buy a modern 26" (ISO 590) wheelset with alloy rims and a 3-speed hub built into the rear wheel (the shifter is usually included). The biggest problem with using vintage 3-speeds for transportation, is that they have caliper brakes and steel rims - a combination that provides inadequate stopping power in wet weather conditions. An alloy wheelset will solve this problem. Several bike shops sell such wheelsets online at reasonable prices:ASunwheelset fromHarris Cyclerywill set you back $200. AnAlexwheelset fromNiagra Cycle Workswill set you back $130.Your local bike shop might be able to order a wheelset from a catalogue as well.
Step 3:
Buy a set of 26" (ISO 590) tires with puncture protection. Schwalbe Delta Cruisers in either black or cream are a good choice, because they look classic, make for a very comfortable ride, and cost only $40 for the pair.
Step 4:
Assuming that you are not skilled in bicycle repair, maintenance or assembly, bring your vintage bike and all the parts to a trusted local shop. Ask them to replace the wheelset, put on the new tires, and give the bicycle a thorough tune up. They will probably end up replacing the chain and some cables as part of that process as well. It should run you about $100.
Step 5:
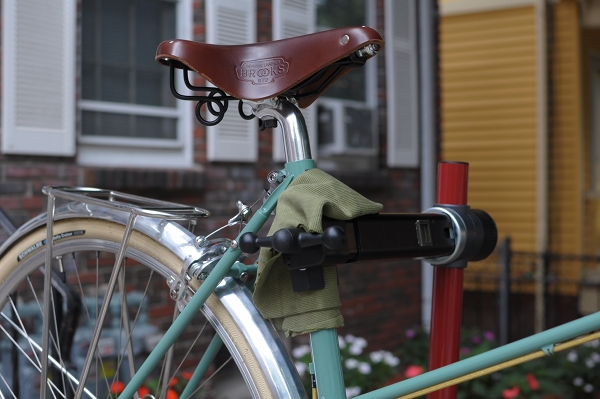
If the vintage bike you found did not come with a saddle and there is room in your budget, get a Brooks or a lower-priced VO leather saddle. If you are tapped out, look for a vintage saddle, or buy a cheap generic one as a temporary fix until you save up the extra money for a new, quality one.
 [image via niniferrose]
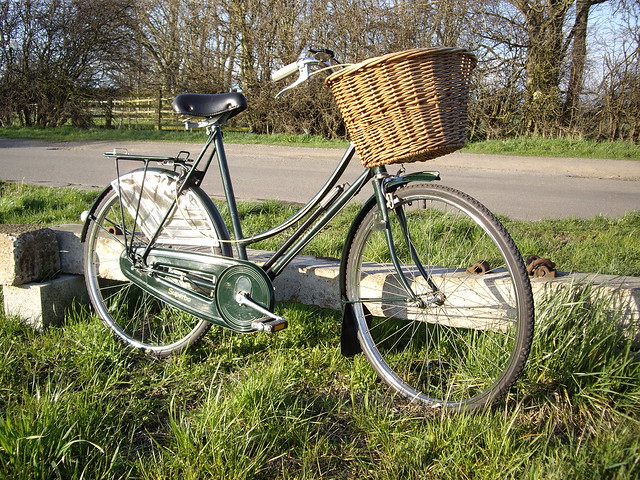
 At the end of this process, you will have a bicycle with all the comfort, durability and charm of a vintage 3-speed, but with modern braking power. It should last pretty much forever and should feel great to ride. Yes, organising the bike will be a small adventure - but again, it can be done if you put your mind to it.
Having said that, I realise that most of my readers will opt out. For one thing, it seems difficult and time-consuming. It also probably seems absurd to spend a total of $500 on a vintage 3-speed, when you could go to the store and get one of thesefor the same price, brand new and shiny. I sincerely understand that.But...
Consider that the second most frequently asked question I get from readers over email is a variation of this one:
Three months ago I bought a [Budget Manufacturer X] bicycle, because my budget was $500. Actually, I ended up spending a bit more than that, because I got the 7-speed version. And Basil panniers. And a Brooks saddle. And cork grips. But anyway, I thought the bicycle looked nice and I liked how it rode when I tested it outside the bike shop. But it's only been 3 months, and now my rear fender is making clunking noises, and my chain has come off twice, and I keep getting flat tires. Also, the bike doesn't feel that great over pot-holes and my hands start to hurt on the handlebars towards the end of my commute from work. My bike shop says that I can update some of the components to fix these problems, but it looks like that's going to cost me another several hundred dollars. I am not sure what to do now. What do you think?I never know quite how to answer that one, because at that point the person has already maxed out their budget. Any suggestions? And yes, I am perfectly serious that I get these emails. I respect it when people say they are on a tight budget and I would like to be helpful with solutions instead of saying "save up for a better quality bike". But I honestly cannot think of a solution that I trulybelieve in other than my vintage 3-speed plan. I have never received an email from anybody complaining about their vintage Raleigh Sports.


 Once a cyclist begins to ride longer distances, it is inevitable that they will hear the siren call of the Century - the 100 mile ride. While 100 miles is as arbitrary a number as any, it has an undeniable cachet to it. It is a three digit number, a round number, and impressive number. Put simply, 100 miles is unambiguously "a lot." It is often considered a marker of seriousness when it comes to long-distance cycling.
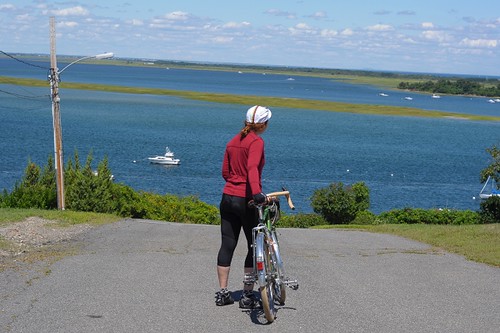 Although I never set it as a goal for myself to complete a century, to tell the truth I thought that surely I would have done it by now. Distances of 30, 40 and 50 miles were so easy for me almost from the start, that I assumed 100 miles would inevitably follow. However, it is now my 3rd summer of cycling and somehow I still have not managed it - 65 miles being the longest distance I've covered so far in one go. One obstacle has been lack of time. As someone who gets annoyed when others tell me they don't have time to cycle, I can't believe I am using the same excuse. So maybe I should rephrase: My time management skills have been inadequate. I try to set a day aside for a century ride, but something inevitably comes up to make it impossible. Shorter rides are easier in that sense, because they do not require taking an entire day off. The other obstacle has been finding places to ride to. While the countryside outside Boston offers excellent cycling, I am having a hard time mapping out routes that exceed 65 miles and are still within my comfort zone when it comes to car traffic and elevation changes. And doing repeat loops just to cycle 100 miles is not appealing.
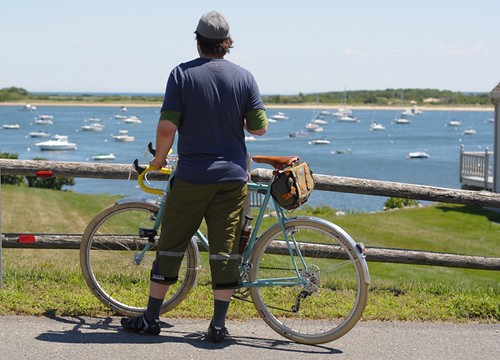
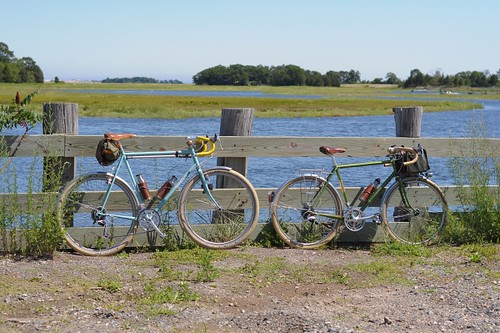 While on Cape Cod last summer, I thought that surely a century would finally be completed. Our plan was to gradually work up to it, but in the end we did it too gradually: Just after the 65 mile ride I got sick, and by the time I felt better it was time to go home. This summer, the inability to reach the 100 mile mark is becoming almost comical. Now that we are on Cape Ann - with both the time to do it and the perfect location - weather and other factors have intervened to foil our plans repeatedly. 50 miles along the coast has been the longest we have managed so far, and with half our stay over and more storms predicted for this week, it's possible that a century is simply not in the cards during this trip either.
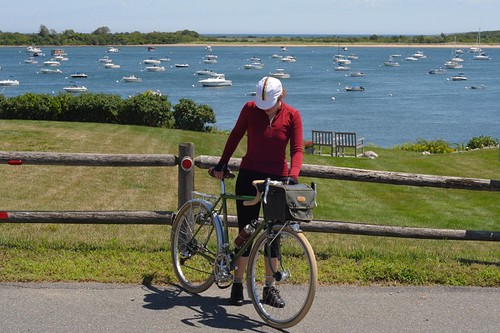 It is becoming clear that, while I am accustomed to fitting rides into my life "organically," the century may necessitate a different approach. If I am serious, then I will need more careful planning, stronger determination, and a willingness to do it in poor weather conditions or along a route that I am not entirely comfortable with. But frankly, that just doesn't seem like much fun. When I finally find the time to do a 100 mile ride on my terms, it will be fantastic. But to approach it as a grimly goal-oriented undertaking for the sake of saying that I've done a century would defeat the purpose. As far as endurance goes, I am fairly confident that I can handle the mileage, so it's just a matter of an opportune situation presenting itself. I am sure someday it will.

 Casa Grande Peak, looking back on the trail, about a quarter of the way in. This was one of the easier stretches. Thank goodness it wasn't all uphill all of the time!
 From the halfway point, looking south. Views like this is what made the trek worthwhile!
 And this! The view from the top! Casa Grande on the left. The “v” shaped area is called the window, for reasons I'll explain later. The Basin is the low area in the center and is where the campground was located. The white ribbon streaking through the center is the road leading to the Basin and the Lodge. The Lost Mine Trail began about where the road disappears in the center going toward the Basin.
 A zoomed-in shot of the Basin and campground.
 Heading down. Again, this is one of the easier sections of the trail. Lots of switchbacks. Lots of rocks. Going down took almost as long as going up. It was also harder on the legs, but much, much easier on the heart and lungs! After 4.8 miles and 3 hours I felt tired, for sure, but also exhilerated. It was my first “long” hike, and I made it back safe and sound.
 More of Williamsburg. Today we had a nice lunch together. We were the only ones in the restaurant which meant the server could chat with us. Sometimes that is a nice thing, sometimes that is not so nice. It was ok today. Nathan commented on the great copper plated menus and he told us the guy who ordered them got fired over it. They were very pricey and he ordered 500 of them. Very strange, since maybe 100 would have been enough for this place. Ah, the things we learn from talking to people.


 And for Jack and Diane:


 Sometimes Somerville really is a village. On my way home last Friday, I discovered the Co-Habitant, Somervillain and Brian P. engaged in what appeared to be an impromptu bike-testing party, after having crossed paths on their way home from work. The many other cyclists who rode by craned their necks with interest, because of course none of these were "normal" bicycles. Somervillain had his Bike Friday tandem, which he was riding alone. The Co-Habitant had his Pashley. And Brian P. had his Bullitt cargo bike. My own arrival on the swan-frame Pilen complemented the scene nicely.The sun was setting over the Peter Forg Manufacturing Co., bathing the street in that magical golden light. I had wanted to try Brian's cargo bike, and now was my chance.
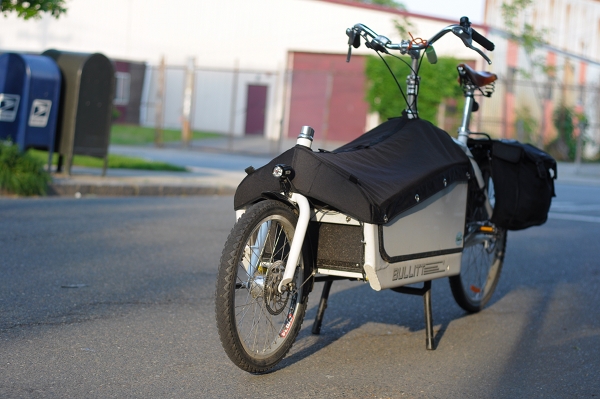
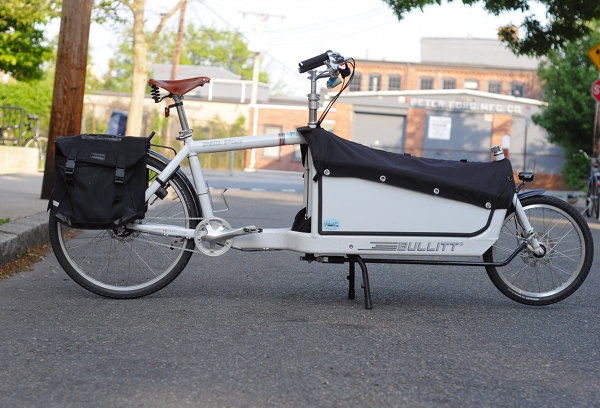 The bike is a Bullitt "Milk Plus" model, made by Larry vs Harry. It is a Danish cargo bike, based on a traditional "long john" design - similar to a Dutch bakfiets, but with a longer and narrower cargo platform. Larry vs Harry market the Bullit as being fast and sporty in comparison to other cargo bikes. The bike is 245cm (96.5") long, 45cm (18.5") wide, and it weighs 24kg (53lb) unloaded. It has a 20" front wheel and a 26" rear wheel. Detailed geometry specs and blueprints are available here.
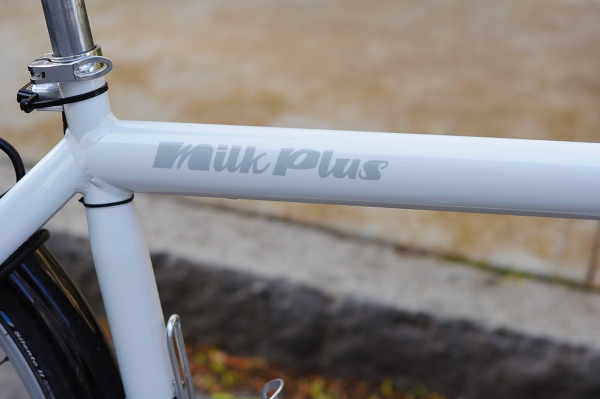 The frame is heavy-duty welded aluminum.
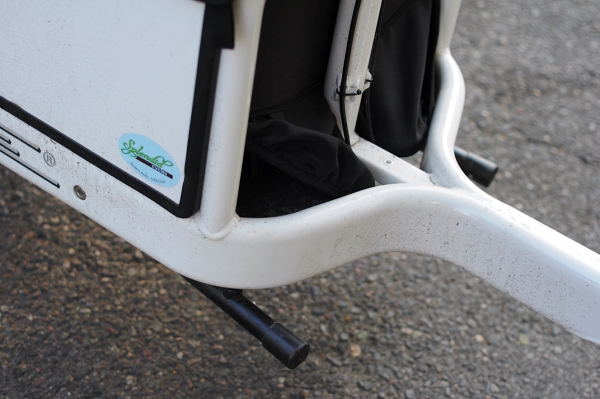 The frame is described byBullittownersas extremely stiff.I like the part where the main tube branches out to form the platform - there is something visually appealing about this junction.
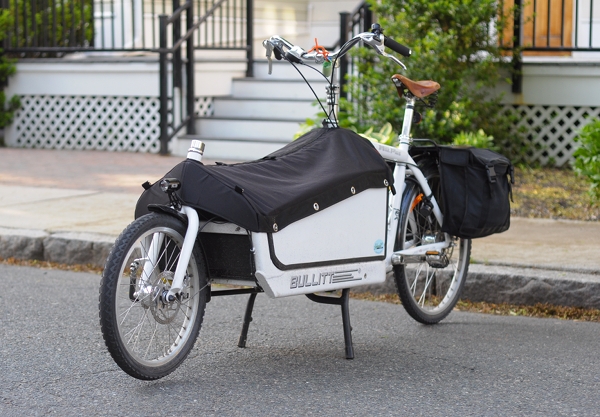 The (optional) cargo box is plywood. It can be used to carry cargo or passengers and comes with a water-resistant cover.
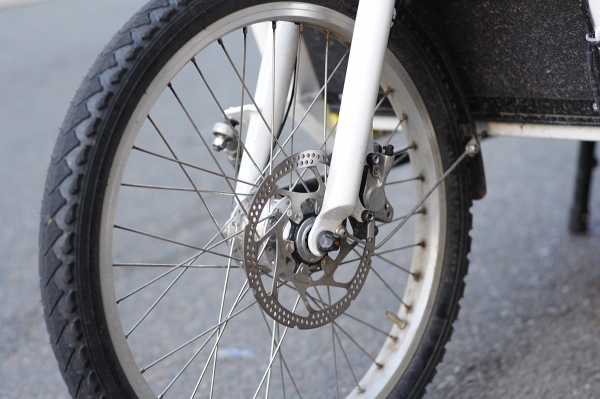 The bike is equipped with disc brakes.
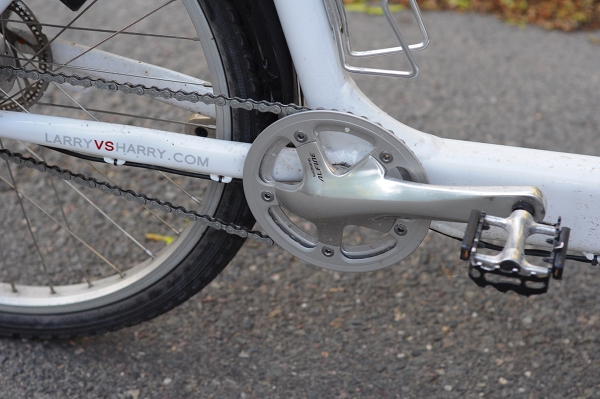 And an 8-speed IGH drivetrain. See here for complete specs.
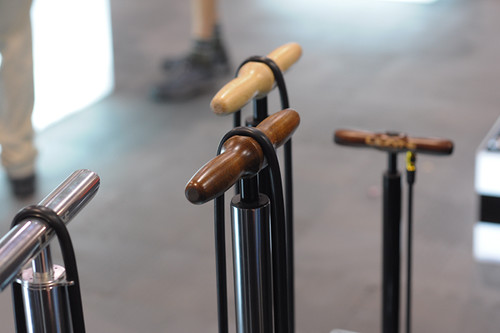
 The wide double kickstand keeps the bike unquestionably sturdy and is easy to activate.
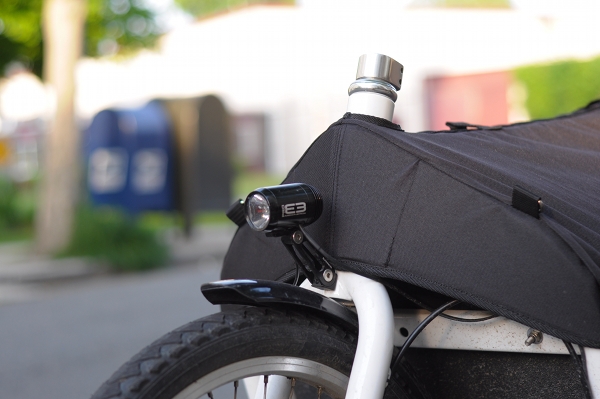 Brian bought this bicycle from Splendid Cycles in Portland, OR, and they installed a dynamo hub with the Supernova E3 headlight and tail light.
 He also replaced the stock racing-style saddle with a Brook Flyer, and he says that that the sprung saddle works well with the stiffness of the frame.
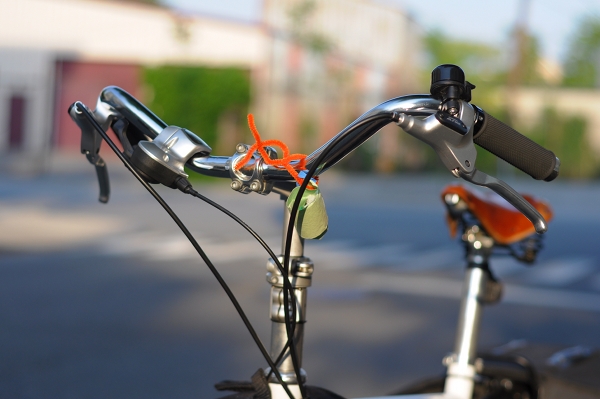 He replaced the stock mountain bike-style handlebars with North Roads,
 and added a modified Civia rack from Calhoun Cycle with a set of Dutch panniers.
 I found the overall look of the modified Milk Plus Bullitttextremely attractive and was looking forward to trying it. It felt well-balanced as I was walking it, which gave me hope.
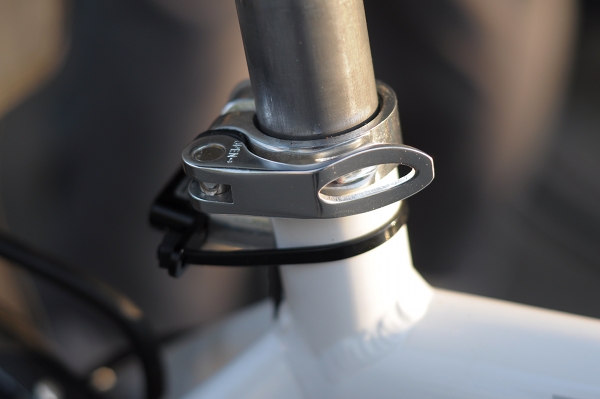 The saddle is quick release and smooth to operate; I was able to adjust the saddle height myself.
 The stem is also quick release, making it possible for different riders to adjust handlebar height to their tastes.
 I was able to step over the Bullitt's top tube while wearing a skirt without having to swing my leg around the back; the standover height is similar to that of a large mixte. I was comfortable and ready to ride the bike... which, unfortunately, was not so easy! The main problem is that the Bullitt needs to gain momentum in order to become stable. When just starting or going slowly, the long front end fishtails wildly and the bike is difficult to control.
 After a few shaky starts, I did manage to ride the Bullitt down the street and pick up some speed, only to falter when attempting to come to a stop. Luckily, the bike was easy to hold up once it started to fall over to the side, so I did not outright crash it into the ground. Not wanting to damage somebody else's shiny bicycle, I did not make further attempts. Not pictured here, but Somervillain tried the Bullitt as well with similar results- false starts, then finally getting it going, then dumping it when attempting to stop at the end of the street. There is a learning curve.
 I understand the concept of having to get the bike up to speed in order to achieve stability. But unless I am missing something, this seems at odds with using it in stop-and-go traffic - which is what I thought cargo bikes are designed for... In any case, some riders may find operating the Bullitt more intuitive than others.
 The Co-Habitant pretty much was able to ride it, though he described the same fishtailing sensation and said that he'd need a lot of practice to feel comfortable with it in traffic.
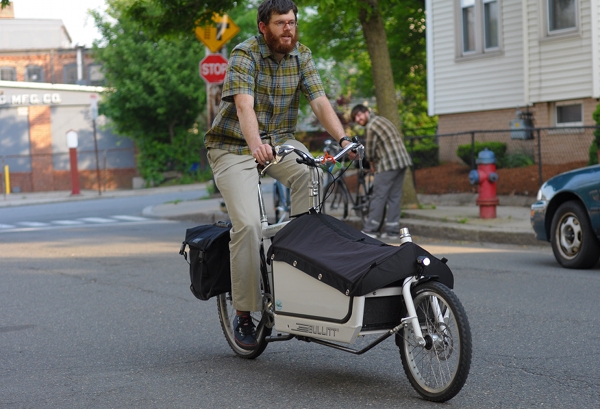 Brian handles the bike like a pro, making it look extremely easy. He reports having been able to ride it pretty much on the day it was assembled - sticking to local streets initially, then venturing into heavier traffic.
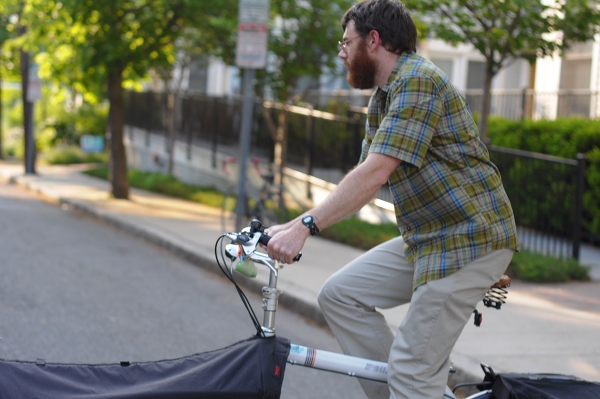 Looking at these pictures, it occurs to me that perhaps people with beards take to the Bullittfaster than people without. Based on our very scientific sample size of n=4 at least, that seems to be the case.
 At this point, Brian has had the Bullitt for just over 2 months and enjoys it tremendously. It is indeed supposed to be faster and more maneuverable than other cargo bikes, once you get the hang of the handling. Brian lives atop of an insane hill that I would hate to tackle every day even on a roadbike. He finds the Bullittmanageable when cycling up it. Typical commuting speed is about 10mph, or faster with no cargo. Normally, Brian uses the Bullitto pick up his son from daycare and for groceries. He has also done a camping trip on it once, which he will soon describe on his website. When I asked Brian for critical feedback, he replied that the size made the bikeunwieldy to walk - for example, when strolling with someone else on the sidewalk. There is also no good way to secure valuable items on the bike, making multi-trip shopping difficult. These issues are of course common to all cargo bikes.
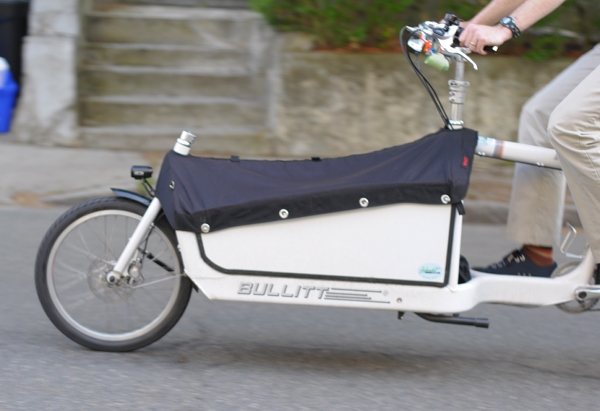 The Bullitt Milk Plus with Brian's modifications is dashingly handsome, and just the right size for the kind of cargo we'd need to carry. If I could ride it, I'd be seriously fantasising about it. But while I can see myself quickly getting used to the Christiania trike I tried earlier, realistically speaking I cannot imagine feeling comfortable enough with the Bullittto ride it in traffic. The slow-speed handling is just too quirky for me.Reactions to theBullittseem to greatly depend on individual bike handling skills and preferences.For those who can handle it, the Bullitt is a unique cargo bike option in the combination of speed, agility and load capacity it offers. But I would strongly recommend test riding this bike before buying.