Saturday, October 29, 2011

Super Classics in the Near Trapps: Grand Central (5.9), Roseland (5.9) & Birdland (5.8+)

All these buckets of rain; so depressing. I had to cancel on the Gunks the weekend before last, and it looked like the next weekend might be a washout too. But undaunted, I planned for a Gunks Sunday with Liz and Adrian and hoped for the best.


It was quite foggy the whole way up to Exit 18. When we arrived at the cliffs, the path beneath the Near Trapps was muddy. The air seemed pregnant with moisture. But the rock appeared dry, or at least dryish. We walked in the direction of Gelsa (5.4), figuring it would be best to start with something easy. We dodged puddles on the trail.


Our plans changed when we stopped to look at Grand Central (5.9), a three-star classic. The vertical cracks at the start were very attractive to my crack-addicted partner Adrian. For my part, I was game for a three-star 5.9, but I wasn't sure I wanted to do it if the rock was damp. What happened to that easy warm-up we were going to do?


Adrian wasn't going to be denied. He was ready to go. So I said okay. But I didn't want to be on the hook for the crux second pitch, so I suggested he combine the short 5.6 pitch one and the steep 5.9 pitch two.


(Photo: Into the mist on Grand Central (5.9))


It turned out that the rock felt fine. Adrian flew up the first two pitches of Grand Central. He got to the traditional first belay in no time, then tiptoed through the rightward traverse around a nose to a stance beneath the steep, crux face on pitch two. Adrian complained about the traverse being a little spicy (his actual words were "that's a-one spicy meatball!") but I thought he had good pro. He then tried a couple different tactics before settling on his approach to the crux face. He started up right, then stepped down and went up left to the belay stance beneath the pitch three roof.


When I followed Adrian up I saw why Grand Central is such a great classic. There is a lot of variety on this climb. I enjoyed the crack climbing at the bottom, which is no giveaway, and the traverse around the nose, while not very difficult, is thin and quite exposed. I felt like I would have been fine leading the crux 5.9 face climbing that concludes pitch two, but the gear seems to come only at the very beginning of the crux moves, and the leader has to be comfortable working it out through the moves above this gear until the crux is basically over. It isn't particularly run out, but neither is it one of those one-move cruxes with gear over your head. There are several straightforward but steep moves in succession. I thought going to the right was definitely "the way" to do it. There are really good holds over there; every third one felt like a bomber jug to me.


(Photo: Getting started on pitch three of Grand Central)


By the time we all arrived at the belay I wasn't worried about the rock anymore; I was eager to lead pitch three. This pitch is short, but it is a doozy, through a big two-tiered overhang. Dick Williams says the pitch will go at 5.7 to 5.9 depending on your height. Immediately above the belay the huge roof looms. There is a notch running through the roof that provides a perfect slot for a #2 Camalot and a fist jam that isn't quite as good as you want it to be. The trick, if you're short like me and my partner Liz, is to find a way to get your feet up so you can reach for the jug above the roof. If you're a little taller, like Adrian, you can just stand there and grab the jug, making the climb a few grades easier and infuriating all of your partners in the process.


After a couple of false starts, stepping up, sliding/stepping/hopping down, then adding another back-up piece in case I fell out, I really went for it and it was a blast. I pulled up over the roof into a cramped, pumpy stance, wormed in another cam, moved awkwardly one step to the left, pulled over the second (easier) overhang, and it was over.


I couldn't recall a more exciting 20 feet of climbing. It was a great rush, and if you call it a 5.9 pitch, I would say it's a great introductory 5.9 lead. The hardest move is the very first one, and there's great gear. If you fail to grab the jug you can hop right down to the stance, as I did a couple of times.


In retrospect, I think it would be better to combine pitches two and three, rather than combining one and two as we did. This arrangement would better minimize drag. But I'm happy we combined one and two, because I got to lead pitch three!


After we were done with Grand Central we found Roseland (5.9), another three-star classic, sitting open. Dick Williams calls the first pitch one of the best 5.9s in the Gunks. I had never considered climbing Roseland before, but after taking one look at it I was eager to get on it. Roseland goes up a vertical crack at the back of a pretty open book. Halfway up the crack, there's a roof. And at at the end of the crack, a traverse under an overhang leads to the final moves up to a bolted anchor.


(Photo: approaching the first roof on Roseland)


It looked hard. And it was seeping a little water. But I also thought the pro looked great. The vertical crack seemed like it would provide secure placements at will. I figured the climbing would be a lot like the first pitch of Airy Aria, a corner climb in the Trapps that was one of my first 5.8 leads, and one that I really enjoyed.


I told Adrian I wanted this one. He was fine with it.


And then I proceeded to get my ass kicked a little bit.


I headed up the opening crack, placing lots of gear, having fun. The moves were great. Every step seemed technical, interesting. before I knew it I was at the roof. The crack continued around the side of the roof, providing good holds. I pulled up over the roof with no problems. Things were going well.


I was almost at the traverse. As I neared the top of the crack, the climb grew steeper, pumpier. I could see a pin out on the traverse, beneath the ceiling. It was a burly angle piton. I couldn't wait to clip it. But first I had to get established in the horizontal crack under the roof. This crack would provide the only handholds for the traverse. And the crack starts out very thin. With the pump clock ticking, I had no time to waste. I made a big step out, putting my right toe on a crease. I tried to stick my fingers in the crack. There was chalk all over it, so I thought I could use it. But I couldn't get my tips into it. The crack was too thin.


Suddenly I got scared, and a little spooked. I felt pumped, I was leaning out, and I had nothing to hold on to.


"Dude, watch me!" I yelled at Adrian. "I think I'm about to fall!"


I looked down and my last piece was, to my surprise, below my feet. I wanted gear higher, at the top of the vertical crack. I reversed the moves, going left and down a step. Then I got in a great cam and clipped it before saying "take" and hanging off of it.


I needed to regroup.


As I rested there a minute I looked over the traverse. I could now see the holds; I just hadn't reached far enough. And the feet followed an obvious line of edges. If I'd been more patient I might have seen all of this the first time. This was going to be okay.


Once I got going again, the first move of the traverse was the hardest. I made the big step and with great relief clipped the first pin. Moving to the second pin, the climbing was pumpy but I felt pretty secure with the hands and the feet. The traverse got easier as it progressed, and although I've read complaints that Roseland has gotten too polished, I can't say that problem ever entered my mind while I was climbing it.


After the traverse Roseland still comes at you: another couple of steep moves and a big mantle get you, finally, to the bolts.


As I look back on it, I think I did reasonably well with the actual climbing on Roseland, but the other aspects of my performance really suffered. I got scared and had to take. My rope management was horrible, creating so much drag that by the time I reached the anchor I could barely move the ropes. And I fumbled with a biner and dropped some nuts on the traverse. What can I say? This climb got to me a little bit. It was hard for me.


When I lowered off of it I felt exhausted.


But oh, what a great pitch. Roseland is packed with quality moves. It is a stiff 5.9 that just doesn't let up. I was sort of correct in figuring that it would be a like Airy Aria, except Roseland is longer, steeper, more technical, and includes a roof problem in the middle and a thin traverse at the end. Aside from all that, it is just like Airy Aria!


I would gladly lead Roseland again, and I hope to send it next time. Despite its difficulty I would recommend it to anyone looking for a 5.9 to try, because it takes such great gear. You can throw in a piece and take a break at any point if you want to. You would take a swing backwards if you blew the crux move to the pin, but so long as you place gear at the top of the vertical crack I don't think a fall there would be too bad.


After we'd all had our fill of Roseland I ran over to check on Birdland, a climb that has been on my ticklist for a long, long time. Something about the first pitch face just calls to me, begging me to climb it. It ascends the right-hand face of a big open book, much larger than Roseland's. The angle appears reasonable; the face seems so climbable. I have stood before it on several occasions and been so excited at the prospect of hopping on it. But I've held back, partly out of fear. Testpiece face climbs scare me, and Birdland is known as a testpiece face climb. It is a 5.8, but some people think it should be a 5.9.


The crowds have also kept me away. Birdland may be the most popular climb in the Nears. It always seems to be occupied. Both pitches are very highly regarded, and the first pitch ends at bolts that can be used to toprope several popular harder climbs around the corner as well.


Earlier in the day we weren't surprised to find Birdland occupied. But after we did Roseland, we found it open. And after my brave struggle with Roseland I realized I no longer feared Birdland. Gunks face climbs have felt really good to me lately. I felt good on Pas De Deux. I felt good on Apoplexy. Why not Birdland? It was time.


The only problem was that my buddy Adrian wanted to lead it. I had snatched Roseland from him, after all. It was his turn. And yet I had to have pitch one, and I told him so. I confessed I'd been working up to this lead for a long time. And bless his heart, he let me have it. Such a nice guy.


The pitch went down like butter.


It is a beautiful pitch. Great rock on a nice face. The line wanders just a bit but there is a natural path to it, pretty much straight up through flakes, then a touch right to the arete, then straight up again through the face to the anchor. After an initial steep cruxy move to get established on the face the angle is low, so there's no pump factor, just a bunch of great moves with very good pro.


(Photo: A mini-crux right off the deck on Birdland)


At one point there was an interesting move, right before a fixed piton, in which I stepped on a tiny pebble to move up. And afterwards I realized I had just done the crux everyone talks about. I recall reading about this crux; it is reputed to involve iffy pro and a "secret" crimper hold. But I had a good cam right before this move (I think it was a .3 or .4 Camalot in a vertical crack), and the so-called secret hold was so covered in chalk there was no way it could remain much of a mystery. For me, on this particular day, the crux was over before I even realized it was a challenge.


I'm not trying to pooh-pooh the crux of Birdland as if it's no big deal. Liz struggled with it when she followed the pitch, and she's a great climber. Last year I'm sure it would have been a whole different experience for me, too. And that's really my point: it is amazing how things can change when you lose a little weight and adjust your mindset. I'm now in a so much healthier place, both physically and mentally, than I was a year ago. Last year I wanted to believe I was still as solid as ever on Gunks 5.8s, but in the wake of my climbing accident I was really a different climber, worrying and shaking my way up climbs I would have cruised through before the accident. Now that I'm feeling good again I realize just how far I was set back.


It's so good to pick up where I left off, working on 5.9s and feeling awesome on the 5.8s. Reaching the bolts at the end of pitch one of Birdland was a little like a homecoming to me, even though I'd never been in that particular spot before. Everything about it seemed familiar and right. I can only pray to the climbing gods that the good karma continues; I know now how fragile progress can be. One stupid mistake or blown muscle and it could all get set back to zero. It happens all the time.


After the joy of pitch one I expected pitch two to be an afterthought. I had never given it much consideration before. But I knew it was supposed to be good, and very different from pitch one. From our vantage point at the bolts it sure looked steep. It was supposed to be Adrian's lead, but as we stood at the belay he told me that if I was into leading it he didn't mind giving it to me.


I was taken aback. I told him I'd be thrilled to lead it but that I didn't want to be a hog about it. He handed me the gear.


The second pitch of Birdland is not better than the first, but I think it is equally good. It starts with the technical crux, a few thin moves right above the anchor, to a pair of pitons that I'm guessing used to form the belay station for pitch one. After that, it is an overhanging jugfest up to a big, left-facing corner. There are ledges along the way if you want to take a rest. And then the physical crux comes: a steep and awkward pull up into the big corner.


Once you're in the corner, an easier traverse with good pro brings you to an escape from the roof and the finish. A very high quality pitch, with good pro the whole way. Steep and pumpy, it provides the perfect counterpoint for the technical face-climbing on pitch one. To my mind these two pitches together make Birdland perhaps the very best 5.8 in the Gunks.


No wonder it's so popular.

Friday, October 28, 2011

Mt. Rainier, Disappointment Cleaver


Someone had this crazy idea to climb Mt. Rainier on the 4th of July to watch the fireworks from the top. It might have worked, except it ended up being cloudy on the west side of the state!


We started out that morning and headed up the well worn, normally crowded, DC route. By the time we got above Camp Muir, all the climbers for that day had already come down. We had the entire upper mountain to ourselves! The Ingraham Glacier, Ingraham Flats and Disappointment Cleaver.


David on the nose of DC. Cadaver Gap and Mt. Adams in the distance.


David holding the hand line on the big traverse over to Gibraltar Rock.


David in the crater on the top of Mt. Rainier.


Doug in the crater.


The shadow of Rainier hitting some low clouds at sunset. It was really strange and pleasant to climb that route and not see any climbers above high camp. We did see a few distant fireworks in the Yakima area on our way down. It didn't turn out the way we had hoped, but it was still a great day to try something new on our favorite mountain!

Tuesday, October 25, 2011

Terminated

This is a macabre post, so avert your eyes (or check out this site) if you don't like to think about anything really, really, really cute being injured, shot or killed!

As you can see, we have "Pickles." Pickles is a Cascade Fox. And unless you're an insensitive brute, most people would consider him a very adorable little guy. The problem is, Pickles was so charming, that he attracted a lot of friends, and with those friends came problems. This week, Pickles had to be euthanized (i.e. shot) because he was seriously injured. The general feeling is that he was injured because he was fed by humans.

So the story goes, Pickles was injured (or ensnared) a few weeks ago. Since then, he's been seen pathetically limping around the park near the road between Longmire and Paradise (let me say that this was not a very pleasant sight to witness). No one is sure what it was that exactly injured him, but something did destroy his right front leg. The general thought is that it was probably a vehicle, but maybe a trap. We really don't know. What IS known is that Pickles loved human food and became habituated to humans behavior. With that habituation came problems. The NPS biologist had this to say on the matter,

"After consultation with two wildlife veterinarians, we decided that this animal did not have reasonable prospects for survival in the wild. The leg injury was severe and there was some indication that there was head injury as well. This Cascade fox was fed by people well prior to the injury (even after the injury). Fed animals like this one quickly found that hanging around the frontcountry and roads between Longmire and Paradise was really rewarding. What the feeding public does not understand is that what they do has consequences - some very serious consequences.

This was the third Cascade fox/vehicle collision recorded since 2005. All were fed animals or cubs of fed animals. Vehicle occupants and wildlife are at risk when aimals are fed. Like the old adage with bears - fed wildlife most often result in dead wildlife.

Addressing the park's wildlife feeding problem is a big task that is going to take a while. We've been working to increase awareness of the issue with park staff and visitors but have a long way to go. We're seeking help from social scientists, trying different ways of getting information to the public, and are seeking funding to help reduce the problem. Please help me get the word out.

So here's the word. Don't feed the wildlife! Or...

Monday, October 24, 2011

A day in the life of Dutched Pinay

When I am not travelling abroad part-time, I am still travelling within the country (Netherlands including Belgium) full-time.

Next week will be a heavy week with Maastricht again and Belgium on the list among other places. Anyway, I have always loved driving. It gives me the rush, the freedom and I actually look forward to long drives. I just need to watchout for speed cameras otherwise I will end up paying lots of penalties every month!

Picture of my car's GPS was taken today during mid day after my first meeting and a quick lunch in Amstelveen (beside Amsterdam). I have simulated here the route for my next meeting in the south of the country which is in Eindhoven. February

Even More Adirondack Acktion: Pitchoff Chimney Cliff & Barkeater


(Photo: Getting ready to commit to the crack on the 5.6 pitch two of Pete's Farewell.)


It seems I can't get enough of climbing in the Adirondacks.


Columbus Day weekend seemed like a good opportunity to go hiking with the kids. The weather was forecasted to be outstanding, with highs upwards of 70 degrees. My wife and I made last-minute arrangements to rent a house in Keene Valley. We were set for three days of hiking. Then my wife suggested that on one of the days maybe I could go climbing, if I got a partner.


It sounded like a great deal to me. Done! Show me where to sign.


Adrian was willing to come up and crash on our couch so I was in business.


We got a reasonably early start on Saturday and arrived at our first destination, Pitchoff Chimney Cliff, by 8:00 a.m. This cliff sits in a pretty location, right above Cascade Lakes. It is just seconds from the road and has a couple very good moderate climbs on it. So it is no surprise that it has a reputation for being crowded. We were lucky enough to be the first party to arrive on our chosen day so we headed straight for the most popular line on the cliff, Pete's Farewell (5.7).


Nominally Pete's Farewell is a three pitch climb, but pitch one is only about 40 feet of 5.2. And in reality most of the 40 feet is fourth class. There is probably just one move that qualifies as fifth class on the whole pitch. As we racked up to get started we talked about how we would divide up the pitches. I said I was attracted to the traverse and corner climbing of pitch two and less attracted to the pure handcrack of pitch three. It seemed like I'd hardly gotten the words out when Adrian was already at the belay point for pitch two, having run up the first pitch while placing exactly one piece of pro.


(Photo: Most of the way through pitch two of Pete's Farewell.)


Pitch two is rated 5.6. It begins with a traverse of 20 feet or so to the obvious corner with a crack at the back. There is a pretty good ledge for the feet all the way over to the corner, although there is a little gap that must be stepped across right at the same time the handholds suddenly seem to disappear. It took a little looking around but I found good hands for the step across, then the foot rail became wider and I walked more than climbed the rest of the way over to the corner.


Once at the corner I had to step up into the crack. This to me was the crux. There is fantastic gear available, but still the move is committing. You have to get into the stem/layback with feet that aren't really great. Once I went ahead and made the move, it was no problem, but I was once again confronted with the same old Adirondack feeling of being sandbagged. I couldn't remember the last time I felt so insecure on a 5.6. Once established in the corner, the next few moves don't require quite the same gut check, and before you know it you're out of the corner and at the belay.


(Photo: A few moves up the 5.7 pitch three of Pete's Farewell.)


The final 5.7 pitch was Adrian's lead, and this pitch yet again felt challenging for the grade to me. The pitch follows a slanting handcrack and it is hard to make the first move up into the crack. Once you're in it you've got another good move to a horizontal before the angle eases to the finish.


I thought the two main pitches of Pete's Farewell were both great, and very different from each other. We descended by rapping down the chimney behind the cliff. There is a fixed line that gets you to a ledge inside the chimney and then a walk over to a set of bolts will put you in a position to get to the ground, at the base of Pete's Farewell, in a single-rope rap.


We wanted to do the other most popular line at Pitchoff, The El (5.8). But unfortunately we were no longer alone at the cliff. Pete's Farewell and The El start at the exact same place, and as we rapped down we could see a party coming up the approach pitch for both climbs, as well as another pair on the ground waiting to start up. We were happy to learn that the first of these parties was planning on Pete's, not The El. I decided to just rap at an angle over to the stance for the start of pitch two of both climbs and get in line to begin leading the El as soon as they were out of the way. We were sort of jumping in front of the party on the ground. Was this wrong of us? I don't know. They didn't complain. Carpe Diem, bitches.


(Photo: At the most exposed moment on the 5.7 pitch two of The El.)


It was my turn to lead again so I took on the big traverse that makes up the second pitch of The El. This pitch heads towards the same corner as Pete's Farewell, but instead of going up at the corner, the traverse continues to the outside arete beneath a little overhang, and then around this outside corner/arete onto the face. The traverse then goes on another 20 or 30 feet until you are beneath a crack system that leads up to a big left-facing corner.


Lawyer & Haas call this a 5.7 pitch. I had a fun time leading it and thought it was totally mellow, perhaps because I'm used to traverses from my Gunks experience. The pitch becomes a touch more steep and thin once you come around the arete and onto the main face, out of your belayer's sight. But there is great pro throughout. I never felt like I was at any risk of taking a swing. And the crux is short; the climbing mellows again after a couple moves.


(Photo: Looking up at the 5.8 pitch three of The El.)


The final, 5.8 pitch of The El is another fun, high-quality pitch, with good face moves up to the big corner and then an awkward escape up and right to the top. I felt pretty good about my escape from the corner. Adrian on lead employed an ass-jam onto the shelf above, but I needed just a brief elbow to get through it. A nice pitch, and sustained too. I wouldn't call it a sandbag but it has several 5.8 moves on it.


We liked The El even more than Pete's Farewell, though both climbs are very worthwhile.


By the time we got down from The El the small cliff had become quite crowded. Since pretty much everyone was there for the two climbs we'd already done, we had our pick of other routes we could still do. But with plenty of time left in our day, we decided to head out from Pitchoff and give Barkeater Cliff a try.


When we arrived at the parking lot (at the scenic headquarters of Rock and River guides) we set off immediately on the Jackrabbit trail. There was an obvious, wide path into the woods that matched the description in the guidebook. After about fifteen minutes on the trail we came to a wooden bridge, as the guidebook said we would, and then we started to look for the cairn to our left that the guidebook said would lead us to Barkeater.


But there was no cairn to be found.


So after a bit we started up left, hoping to cross the correct climbers' trail or stumble upon the cliff. The going was steep. We kept going up, trending right, trending left, looking for rock. But no dice. Occasionally we stopped to listen for the sound of clanking carabiners, or belay commands. We heard nothing.


After who knows how long, I tried to use my smart phone to figure out our gps coordinates. But I guess I don't have the app for that; it was fruitless.


Then I looked again at the map in the book, and I realized something was off. There were two little creeks on the map, coming to a "T" at the wooden bridge. But at the bridge we'd crossed we had only seen one little creek.


I started to think we were in the wrong place entirely, but for some reason we kept bushwhacking around. Finally I suggested to Adrian that we head down and retrace our steps. Maybe we'd missed a turn on the Jackrabbit trail; it hadn't been that easy to follow with all the fallen leaves.


As we started to head back, we ran into another pair of climbers.


I have never been happier to see other climbers! I figured they could tell us if we were in the right place.


But no. They were new to the area as well, and were also looking for Barkeater. They were just as lost as we were. In fact, they'd come out to Barkeater after bushwhacking for two hours looking unsuccessfully for Hurricane Crag! Now, I have never been to Hurricane Crag. I don't know if it is really that hard to find. But I had to pity these two. Having just spent an hour and a half searching vainly for Barkeater I wasn't about to criticize them.


I suggested to Adrian that we give up. We could go back to the car and drive to the Beer Walls, near Chapel Pond. They'd be easy to find, and we'd still have time for a couple of pitches.


Back at the parking lot, I was about to put my stuff in the car when I saw an obvious, clear sign pointing to the Jackrabbit trail. It was on the opposite side of the lot. Somehow we'd missed this sign when we pulled up. We'd headed down the wrong trail from the very beginning!


We felt like morons for sure.


If you're moronic like us, please take note. There is a sign at the lot that points to the correct Jackrabbit Trail. Do not go on the other obvious (but unmarked) trail that leaves the parking lot. It will not take you to Barkeater Cliff. Once you're on the correct Jackrabbit trail, the bridge and the cairn could not be easier to locate.


Once we found the cliff, I was impressed. Most of the climbs are just one pitch, but the cliff is still imposing, and beautiful too. The remote setting was refreshing after our morning at the roadside Pitchoff Chimney Cliff.


We didn't have time to do much at Barkeater. I wanted to lead either the face climb Eat Yourself a Pie (5.8+) or the crack climb Mr. Clean (5.9). I expected that given my skill set (and the fact that I love to bake and eat pie) I would choose the face climb, but as we examined Eat Yourself a Pie some guys working on a 5.12 told us they thought it was pretty "in your face" for a 5.8+.


I figured if the guys who climb 5.12 think Eat Yourself a Pie is hard, then maybe I should pick the other climb.


And so I gamely went at Mr. Clean (5.9), a wonderful 60-foot handcrack pitch. I do believe I've made some crack-climbing progress in these visits to the Adirondacks, but since jamming still is not my strong suit I felt insecure the whole way up, and wore myself out constantly placing and replacing gear. I brought up doubles of all the bigger cams and I kept leapfrogging the yellow and red Camalots. If I could have relaxed more and placed about half as much gear, I think I would have led it cleanly, but as it happened I did pop out while stemming at the crux, taking a short fall on a perfect cam placement. Then I finished the pitch.


It was an educational pitch for me. Adrian led it after I did, jamming with his left hand and foot the entire way up, at times ignoring very good face holds in the process. After watching Adrian do it, I tried it again on toprope and cruised to the top, no problem. I tried to do it his way but it just seemed silly to avoid the good holds outside the crack and so sometimes I used them. Then after I toproped it Adrian gave it another go on toprope as well, laybacking and stemming the whole way instead of jamming. He still made it to the top but found it far less secure than when he jammed it.


I wish we had just a few cracks like this at the Gunks so I could get this kind of practice there.


Adrian led Eat Yourself a Pie after we were through with Mr. Clean and I have to say that "in your face" is an apt description for it. The pitch starts with thin face climbing left and up to an arete, with pretty shaky pro for the opening move and a bad landing on pointy boulders if you blow it. Then the crux comes as you move into an alcove and make a very awkward escape from the alcove (with good pro). Finally, lower-angled face/slab climbing takes you past two bolts (it might be nice if there were three) to a steeper corner, which leads to a fixed anchor.


A full quality pitch, with tons of good moves, and yet another testament to how serious the grades are in the Adirondacks.


These two climbs were a great introduction to Barkeater. I'd go back in a heartbeat to repeat them and explore the rest of the cliff.

Sunday, October 23, 2011

Poor Van Dora ...

Wednesday, March 7th - - My decision to leave Salt Lake City yesterday morning was made the previous week. I was ready to go after five weeks researching in Genea-Mecca but in hindsight perhaps I should have waited a few more days... I was headed to California but high winds with strong gusts were forecast for all of Nevada (and much of the west) for the next two days. I could take the northern route and get into the snow storm that was predicted and coming towards Salt Lake City. Or I could take the southern route through Las Vegas then west. After checking the weather reports before leaving yesterday morning I decided the safest route would be to go south.


I haven't checked to see what the weather was like along I-80 so I don't know if my chosen route (I-15 south) was the best or safest! But I do know it sure wasn't an easy day of driving! It wasn't too bad until I got about half way to St. George, which is about 300 miles south of Salt Lake City, when the winds really picked up. By the time I got to St. George, it was definitely two-handed white-knuckle driving! Then when I got into Nevada, there were times when visibility was extremely limited due to the blowing sand. There was an amazing amount of tumbleweeds blowing down the highway too, as well as plastic bags and bottles and various other debris.


My “plan” had been to stop at Valley of Fire State Park for the night, which is about 40 miles north of Las Vegas. But there was so much sand and dirt and gravel being blown about that I decided to continue on south. I stopped just north of Las Vegas for gas and had a really rough time trying to stand in one spot to pump the gas.


I made it through Las Vegas before the rush hour and drove the 50 miles or so west to Pahrump where I wimped out and spent the night at a motel. At around five o'clock or so we had a little rain added to the wind and I was glad that I was inside, safe and dry. I learned later on the news that the wind had been steady at about 30 mph most of the day with gusts up to 75 mph – no wonder my right arm and shoulder was sore!


Poor Van Dora. She needs a bath! This is what happens when you drive in blowing sand then a little rain comes along... I didn't really think the van was all that dirty when I got out at the motel. After the rain, all of the other cars in the parking lot were in this same condition, which means that as the rain fell it must have picked up some of the sand and dust in the air. I think it was basically raining mud, at least for a short time.


Van Dora looks worse now than she did traveling on the dirt roads in Alaska!


Wednesday, October 19, 2011

DBC Swift Test Ride

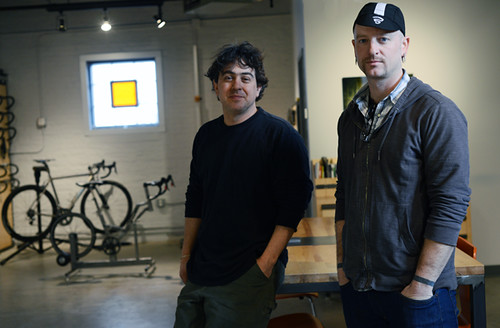
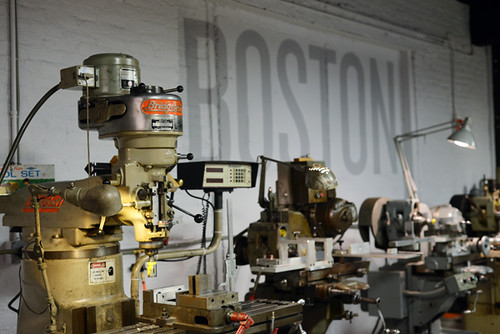
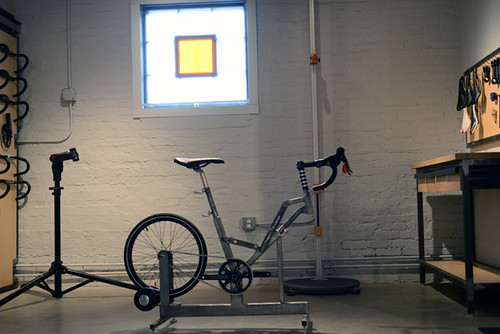
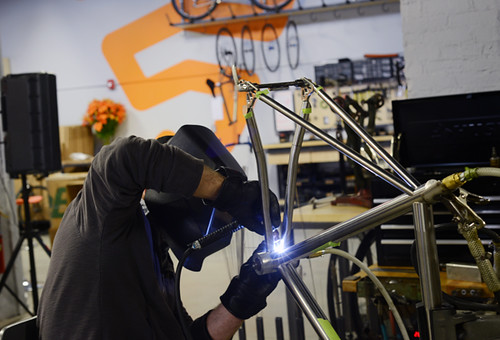
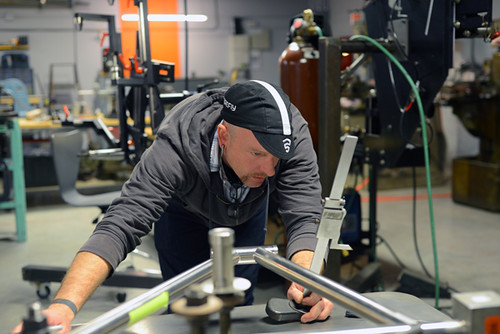
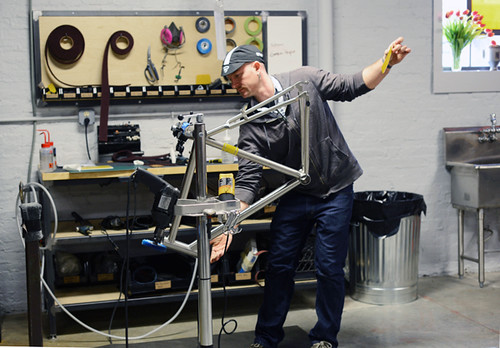
Last night we stopped by DBC City Bikes (formerly the Dutch Bicycle Company) in Somerville, MA to have a look at their new "Swift" line of bicycles. DBC - whose focus was previously on importing Dutch and Danish transport bikes - has now changed direction and established their own line of classichandbuiltbicycles. The Swift models are designed in house by Wentworth and MITgraduates and built to spec by local framebuilders. They had a few floor models at the shop, and I test rode the loop frame ladies' version.


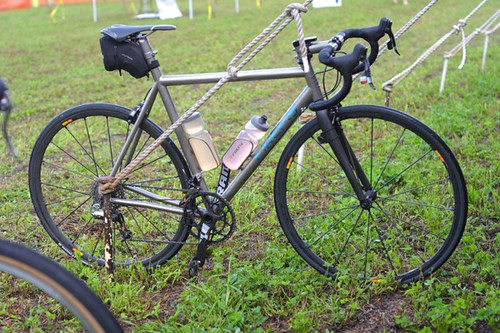
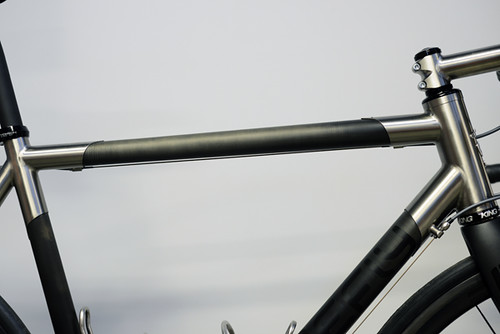
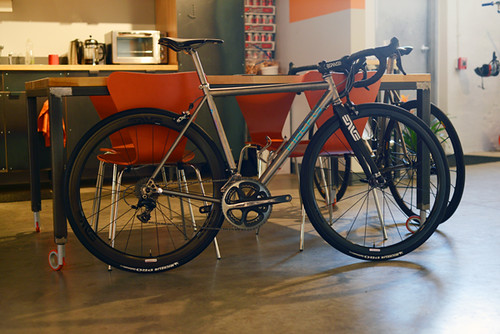
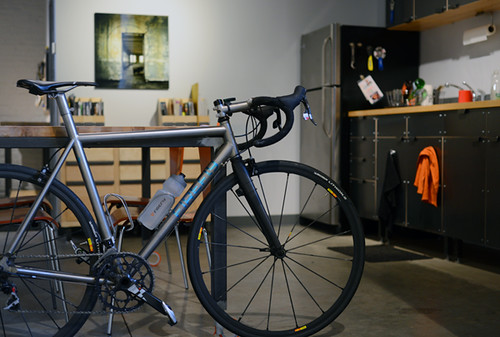
The Swift is TIG-welded cro-moly steel.The build includes upright handlebars, Brooks saddle, internally geared hub, front and rear drum brakes, dynamo lighting, fenders, chainguard, rear rack, and a cafe lock.The curvature of the top tube is executed nicely, and the welding is very clean. There are no dress guards, but nowadays it is becoming easier to purchase those separately. The lack of a full chaincase could be problematic for those who want one, but others would consider the chainguard sufficient. Everything else you might need in a transport bike is included.

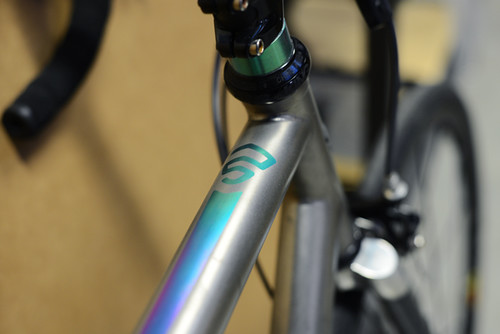
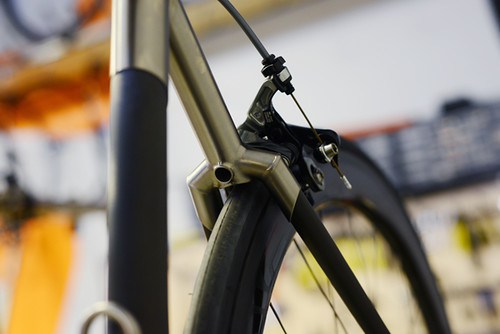
As always, I am not a fan of unicrown forks, but at least the welding here is nice and neat. The fork blades are curved. There are cable routing guides for the lights and brakes. Not sure how they are attached - they do not seem to be braze-ons - and why they were made in a contrasting colour.


The dynamo headlight and tail light are custom: DBC fitted what I think might be SunLite casings with LEDs and turned them into dynamo driven lights with a standlight feature. It's a neat system and the lights are very bright.

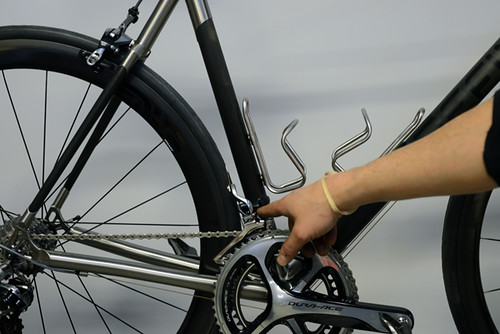
Tail light. Front and rear hubs are Sturmey Archer. The bicycle I test rode was a 3-speed, but they are also available as single speeds and 5-speeds.


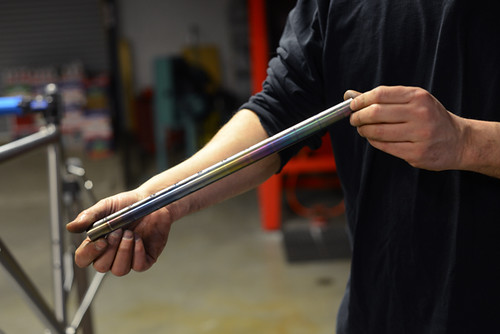
The fluted fenders look like VO to me. The wheels are 700C.


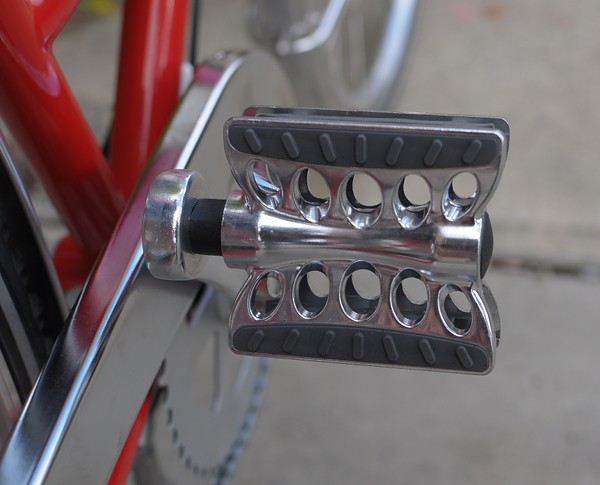
The pedals are attractive and grippy, but it is a trade secret where they are sourced from! (Anybody happen to know?...)


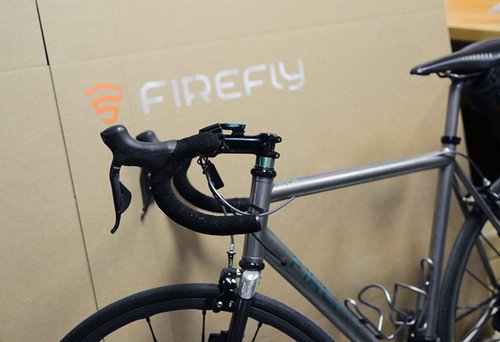
Riding the DBC Swift was a very particular experience. In many ways, it handles like a classic Dutch bike (think Gazelle or Batavus, as opposed to Pashley or Velorbis), but is lighter and more responsive. The angles are steeper and other aspects of the geometry are a bit different, but still - all in all the Dutch bike qualities seem to dominate. In the picture above, you can see how tall the headtube is and how high up the handlebars are - almost at my chest. The resultant sitting position is bolt upright.


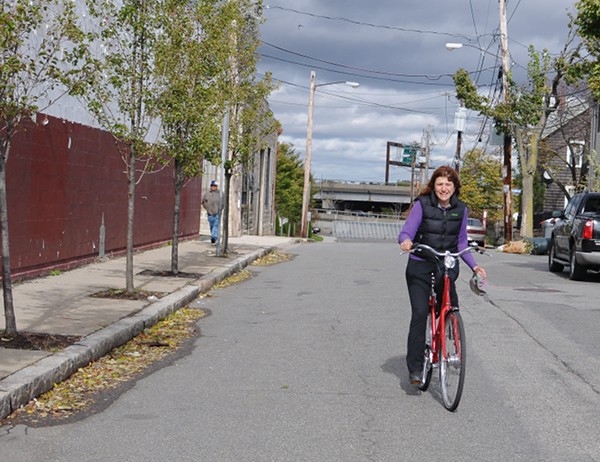
I was not sure what to expect, but I have to say the ride quality was nice: smooth, peppy, lightish, and with an easy feel to it. The bike is stable and easy to control. When my hat flew off my head, I caught it while continuing to cycle; the bike seems fairly klutz-proof. Another notable aspect of the bike, was the superior functionality of the drum brakes. All other drum-brake city bikes I have tried or owned were fitted with 70mm version, whereas DBC fitted the Swift bikes with the 90mm version. Especially for the front brake, the difference in braking power is substantial.


According toDBC, the Swiftis meant to be comfortable and non-intimidating even for those who are new to bikes. In this respect, I think it is a success. At the same time, it was designed to be more maneuverable in traffic and easier to ride uphill than a Dutch bike. In this regard however, I am not sure that it feels much different from my traditional Gazelle. It is definitely lighter and somewhat more maneuverable, which some consider a plus for American streets. But it did not strike me as necessarily "better" than my Gazelle - on which I handle traffic and the local hills just fine. It seems like a good bike though, and whether one would prefer it to a traditional Dutch bicycle is a matter of personal taste - just as whether one prefers lugged vs welded frames.


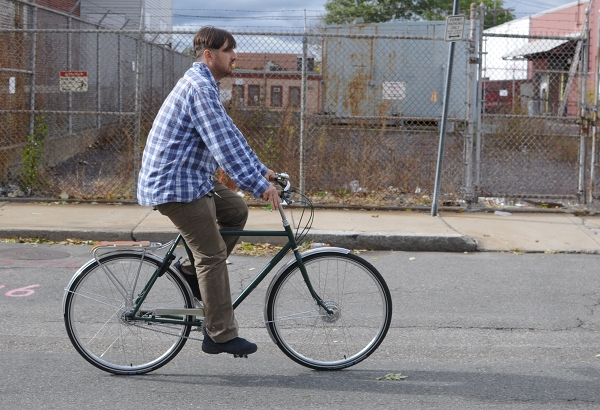
As I was riding the ladies' Swift, the Co-Habitant took a spin on the men's version. I should note that the men's and ladies' versions of the Swift are completely different bikes, designed by separate teams. The angles are different, the proportions, everything. So while my experience of the ladies' model was positive, I have no idea how the mens' handles, and the Co-Habitant's feedback was vague. When it comes to city bikes, I think he is a creature of habit and prefers his Pashleyover pretty much anything else.


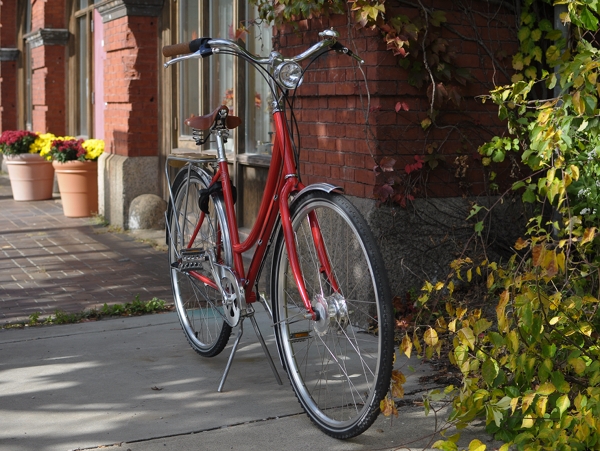
With the ladies' Swift, my impression is thatDBCaccomplished what they set out to accomplish in terms of performance. The price of a fully built bicycle is in the $2,000's, depending on the options. Each bike is built to order and custom paint colour is included in the price. How will the DBC Swiftdo in the long run of course remains to be seen. But it is good to have options: When it comes to handbuilt TIG-welded ladies' bicycles,DBC joins the likes ofANT and Geekhouse.The work of all three builders is different. If you are in the area, try them out for yourself!

"Time Warp and Ice Gear"

I wrote this back on 2/20/08 onour local climbing forum. That winter was the first year I climbedwith a pair of Nomics. Not much has changedin the last 5 years that I can tell really. Head lamps have gotten better. Boots marginally so but nothing earth shaking. Clothes have gotten warmer and lighter. But some of this seemed like a real revelation 5 years ago. Umbilicals and leashless toolsare common now. They weren't well received by all 5 years ago. Most of all I am just glad I finally got off the couch again! It hasbeen a fun ride.


Hopefully beginner and intermediate ice climbers and aspiring technical climbers in an alpine environment will find the info and opinions to follow helpful. Nothing new here. Twight and Gadd cover it all much better in their respective books. The two books compliment each other. Buy them. Twight’s “Extreme Alpinism” has the best coverage of the details. His book is the “required read”. Gadd takes up the technical discussion from where Twight ended. I’ve reread both in the last month several times and gleaned other's suggestions for the Internet to try out. Gear choices are constantly being out dated. Good gear makes climbing easier...and safer.


I have little time for the guys who have opinions but have yet to have btdt. So a little back ground, and still enough ego to share an opinion. Back in the late ‘70s and early ‘80s I was fortunate enough to climb a few routes that are still considered worthy accomplishments. In no special order, the 2nd ascent of Slipstream, mid January, in 7hrs with a car to car time of 14 hr. r/t and a walk down the Athabasca. An early one day ascent of Polar Circus with 3 more ascents of the route by 1982. 2nd solo of the Becky route on Edith Cavell taking a direct line up the climb from the car door, 7hrs from lacing up my boots to the summit cross down climbing the East Ridge and back for lunch. A new route on N face of Temple. The 2nd ascent of Super Couloir on Deltaform, in a storm, via the original finish. Other water fall routes like Upper weeping wall (twice), Pilsner, Carlsberg (a couple of times), Takakkaw, Borgeau LF, among many.


So nothing horrendous even by the standards 20 years ago and light years behind stuff being done today. But climbs many guys are still aspiring to as they gain confidence and skilltoday.


By ’85 I wasn’t really climbing much ice. I was doing a lot of trad climbing up to .12b. Sport routes held little interest for me. I found other hobbies and work too committing. Climbing began to take a back seat after living that life style for 20 years. At some point I realized I wasn’t climbing at all. Not climbing rock, ice or mountains! That went on for too many years.


Then in Jan '08, a full 20 years later, I'm was dragged into Canada for ice, cold turkey, off the couch.


Past 50 years old (trust me that sounds older to me than it does to you) I at least have the means to generally buy what ever I wanted for gear. Yes, time will even solve the major problem of most every dirt bag climber \:\), even this one.


I bought into the Schoeller revolution. I had a pair of stretch European salopettesfrom the '80s that I last guided and heli skied in so I knew that was the right track. Bought the Arcteryx soft shell MX top and bottoms in several weights. More on that later. Also bought a new set of tools, a buddy gave me a set of newer crampons (more later on the subject as well) and off I went. Fat, dumb and if not happy at least excited to be climbing ice again.


Avalanche conditions in Canada this winter could hardly be worse. We started off on Louise. It is cold, I mean –30C cold. I have fewer clothes on than I have ever climbed in. I have the lightest gloves on I have ever used for winter ice and the most flexible ankles in lwt boots that I could image. I hate that damn pillar no matter how many times I have climbed it (over a dozen). But with this gear Louise’s pillar is the easiest I ever seen it.


The next 14 days of ice and mixed climbing were a real education thanks to my many old and new partners and mentors willing to put up with me.


OK, here are “MY” opinions. Not every one will share them. Remember everyone has one and you too are welcome to yours here.


After a full two weeks of climbing in everything from a pissing down NW rain, a snow storm dropping 6” in an hr, and down to –30C with hallowing wind I can say hard shell clothing is obsolete for technical climbing short of some really horrendous conditions I can’t actually image being out in. And with 7 trips to the Alaska Range I can image some pretty shitting conditions. My suggestion? Buy the lightest weight, most stretchy garments and learn to climb in what Twight calls his “action suit”. If it aint got a hood that will go over a helmet easily don’t buy it.


Only caveat to that is your base layer. You might want to think about putting some wool next to your body and a light synthetic layer/s over it. Add hoods that will go under and over your a helmet. The “R” series Patagonia hoody or the really simple Nike hoody (which I like even better for cold weather) works well. Thumb loops on the sleeves have been around 30 years at least and are really cool features in cold weather BTW.


Gloves?

Always take a few pair in the pack or pocket. At least one pair specifically for when it gets really cold from a change in weather, your exhaustion or a long, cold belay. Depending on the climb I will use a thick glove or a mitten. You'll want to error on the side of caution when choosing the “big” glove. You don’t want to pull out the ‘big ‘uns” and find you still are not warm enough and screwed. Heat packs are a good option to carry as well. Remember hydration and calorie intake are as important or more so than big gloves and a belay jacket. I’m using a really light glove made by Mountain Hardware, the “Epic”. REI has the same glove just a bit less durable. Go light…you’ll be amazed. Carry spares to stay dry as required. I’ve only pulled my “big” gloves once this season. But I have gone through up to three sets of the lighter gloves to keep my hands dry. The light gloves aren’t very durable. Leather rappel gloves are a good idea and work well on some hard mixed depending on temps.


Hats? Headbands under the helmet regulate heat better with helmet and layers of hoods than a hat will. The band will also add to your warmth if pulled down to your neckline and nothing to drop. I no longer carry a hat. But I pull on or off any one the layers of hoods over my helmet at belays or while climbing. Try that with a hat while climbing a hard pitch!


Leashes? This ought to get some comments. You’d have to be an a complete, uneducated knob to climb with a leash on a modern tool. No ifs on that one. The human form and the tools are finally a synergistic extension of the mind while climbing. Ice climbing at any level is simpler, warmer and EASIER leashless. Hard to believe but that will make even hard grade 5 ice more secure.


Several of my buddies disagree some with my conclusions and they know the differences, tells me I only came to my conclusions because I haven't climbed ice in 10 years so the change was easier for me. Remember I am an old guy, and trust me if leashless wasn't faster, easier and warmer I would NOT be doing it. I don't give a shit about appearances, I just want to get up the climb as fast with the least amount of effort as possible. Leashless is a big part of both.


Umbilicals? For what the mind can’t control? If you are less than 70m from the ground climb leashless and forget the umbilical. If you are higher than 70m put an umbilical on the damn thing. Nothing worse than sending your 2nd your spare toolor climbing a hard pitch with one tool or being forced to jug or worst of all rap. Trust me, an umbilical is better than wrecking a good relationship or worse yet an expensive trip.


I now flatly refuse to climb with anyone that hasn’t got their tool tied on to something. My time and experience is just too valuable to me to waste it on a tool getting knocked off at a belay or dropped for what ever reason, including me knocking it off by accident. How about leaving a tool at a v thread on the rap. Thathas happened more than once to even some very experienced climbers. Umbilicals use to be seen as a sign of incompetence. Now I see there lack as a sign of ignorance on anything past a short sport route. Before you start rolling your eyes...take a look at what the "big boys" are doing these days on alpine routes. Makes me think that passing 4 tools around between 3 guys (after dropping two leashless tools) on one of the bigger/harder alpine routes made a broad impression.


I've already had to rap 2000' after a partner dropped a tool on a hard alpine route in perfect weather. Lost a perfectly good alpine rack as well in that experience. Not excited to repeat that costly adventure.


Boots? Fruit boot technology is catching up to the Mtn. boot technology. You’ll climb different in them but you’ll also climb better. Ice becomes more like rock climbing in the soft ankle boots. Haven’t found one I want to send 1000m of hard 55% alpine ice in but it is entertaining trying to figure out how to rest the calves with French technique at every opportunity. More time in soft boots will likely encourage me to take them on endurance alpine ice.


Now we have both warm boots and soft ankle boots that have a rigid sole for even my size 12 feet. They can be amazing. Check out the usual suspects to see what fits you. I like the Batura for cold stuff close to the road (they are hard to dry out) and the Spantik for anything over a day out. There are much lighter boots I could be climbing in. We’ve only just seen the beginning to the newest boot technology. In the future look for a dbl. layered fruit boot that is warm enough for Denali which you’ll actually want to use for that M10 at your local crag.


Tools/crampons? Any of the newest tools from Grivel, BD or Petzel works better that anything from even a few years ago. BD seems to have the biggest issue breaking picks. Grivel has the solid reputation of bomb proof and no one can question how well they climb. Petzl stuff is not cheap but climbs very well and is very durable as well. The other brands at the moment are simply "hangers on". If you aspire to climb hard forget anything that doesn’t have good leashless support.


Mono points? If you want to do hard mixed it is the only game in town. Not impossible to climb hard with dual front points but why bother with the extra effort? Same with fruit boots. You don’t intentionally climb hard rock in big boots. Why would you do hard mixed in them? You need to take the time to fit any crampon perfectly. Then take the first few days you climb in them and fine tune the fit. Dropping a tool sucks. Dropping a crampon can easily get you DEAD.


Ice screws? If you aren’t currently climbing with the newest generation of Grivel screws, specifically the Helix, youare wasting energy. I’ve tried EVERY new screw design currently on the market, in almost every snow and ice condition you can think of. With all due respectand with no hype, no bs, there is no other manufacture even close to Grivel's current production. The Grivel screws are as revolutionary to ice climbing as Jardine's Friends were 30 years ago. Big statement I know. But placing good gear, easily, where you want it instead of were you could makes climbing much, much easier and a lot safer.


Add some quick draws, and a few slings made to absorb the load and pretty much set. The lwt wire gate biners hold everything together and don't easily freeze. Plate or “guide” belay devices that will allow you to belay off the anchors with a documented catch on a 400’ fall (yes FOUR hundred feet) will take the rest of the load.


My rack? Helix mostly and only one 22mm screws. With the newest test results I have switched to a lot of 13cm shorties. The Helix stack on a carbiner just fine. Buy the big plastic racking biners from BD or Petzel. They work even better for racking screws and axes.


Headlamps? I spent the last week intentionally climbing many of the 30 or so 60m pitches in the dead of night with a headlamp. I have the high tech rechargeable BD and a cheap 3 AAA Petzel. I prefer to climb with the Petzel as the softer light is easier on my eyes. The BD on the bright halogen setting was good for scoping out the ropes on free hanging 50m raps and complicated route finding. But the Petzel was tiny to carry (unnoticed) and more than enough to get down anything and good enough to get me up anything I can climb.


I am leading at the same level of difficulty on ice now, as I was 25 years ago. You have no idea how unrealistic that really should be. All the while with less effort, while being safer. The main reason, the Grivel Helix. The rest of the stuff mentioned just adds to a more enjoyable and fun experience. Gear will always change over time so stay up on it if you want to keep up.


Spend your money wisely. Thirty year old designs got me up some decent climbs back in the day. The new stuff, if you buy wisely, makes those same climbs much, much easier. That only makes the next level of difficulty much easier to reach. Stay safe and hopefully I’ll see ya out there! I'm the old guy with white hair, and funny tweetie bird boots, stop by and say "hi".
Edited by Dane (02/20/08 6:34 PM)


Interesting comments on the original thread:


http://cascadeclimbers.com/forum/ubbthreads.php/topics/774878/


Happy holidays to all! And thanks for reading Cold Thistle..


Tuesday, October 18, 2011

Writing on the Wall

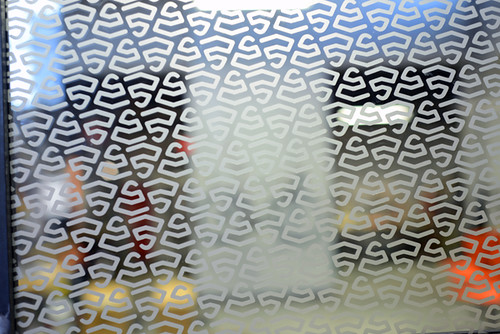
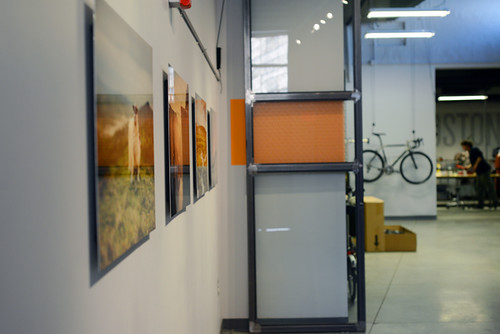
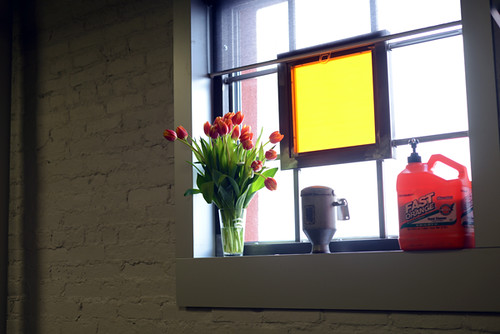
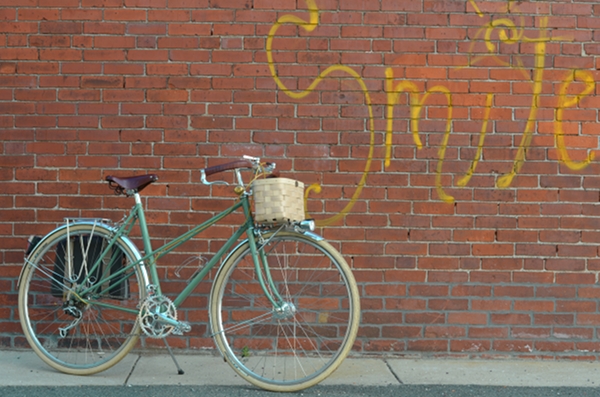
About a week ago, I left the house in the morning to discover the wall of a nearby building covered in graffiti. Screaming for attention with its searing yellow hue and the swirly sunshine dotting the "i" the graffiti tells the residents of our little neighbourhood to "smile." Very funny, we think. Smile because they defaced property? Smile because someone will have to spend time cleaning that up in mid-summer heat and humidity? Smile because this action rubs it in our faces that we are powerless to prevent others violating our living space?


Then a funny thing happens. As we continue to live with the graffiti (the building's manager has not had time to clean it up), the initial feeling of indignation recedes and we begin to take the message literally - to respond automatically to the word's actual meaning, instead of responding intellectually to the symbolic meaning of it having been spraypainted there. Smile! The vandal (artist?) has managed to elevate our mood in spite of everything.


I am not comparing cycling to graffiti, really I am not. But it is impossible not to notice that those who don't ride bikes often feel threatened and, yes, even invaded by the appearance of bicyclists and (gasp) bike lanes in their neighbourhoods. These are strong feelings that those of us who cycle cantoo easily dismiss. But look at it this way: If after some time a vandalised wall can make us smile because of its sunny message, then surely the fun of cycling can be contagious enough to override any hostility toward it as well.


Along the main street around the corner from our house, from 5 pm to 6 pm on any given weekday there is a continuous parade of cyclists traveling home from work. They are all sorts, and most wear their regular clothing - including women in colourful dresses and crazy footwear. Two years ago, not nearly as many cyclists rode through that street - a quarter of the number I see today, at best. There was also a lot of honking from drivers, hostile insults exchanged as a matter of course. Now it hardly happens at all. I see business owners sitting on the front steps and watching the cyclists as the sun sets. It really is a sight when so many different people pass through on their bikes; there is a festive feel to it.

Maybe our neighbourhood has internalised the bicycle as part of its character, as opposed to thinking of it as a hostile foreign body. Maybe drivers and cyclists both have decided to lighten up and smile.

Tuesday, October 11, 2011

The Closest Thing to a Valentine

In all of the photo albums and family papers of my grandmother's, I haven't come across any valentines or love letters written by or to anyone. None. Zilch. Nada. And I don't have any personal valentines (that I'd care to share). So with my birthday being just 3 days after Valentines Day, I thought these cards might be good substitutes for inclusion in the 20th edition of Smile For The Camera. My niece Carrie made them a “few” years ago (when she was 9 or 10 years old). The images were previously published here on kinexxions in July ...


Fog Drip


Fog Drip, originally uploaded by ParsecTraveller.

The last photo from my recent redwood day-trip...

Redwoods are interesting because they capture fog moisture and cause it to drip down into the forest understory. It's what makes the ferns grow big, and what can soak unprepared hikers (like myself)...

Monday, October 10, 2011

Boulders of Ice

Here is another "oldie"... lately it seems I've been more interested in digging through old photos rather than shooting new ones. However, the weather recently has been bringing us cooler temperatures so hopefully there will be some NEW ice to photograph soon :-)


In the meantime, I bring you this shot from March of 2007. We had a lot of ice that year, and some rather unique things happened. We had ice extending out from shore quite a ways and a big wind storm came up, crushing up the surface ice. As the ice rolled around in the waves it was shaped into these round-ish "boulders". Then, the waves flung the ice boulders up onto the shoreline. Most of the beaches in Grand Portage were covered with ice similar to what you see in this photo. It was pretty surreal... and FUN walking along the shoreline and taking in this winter wonderland! This post comes to you on Christmas Eve, so I'd like to wish you all a wonderful and very Merry Christmas!

Sunday, October 9, 2011

Chasmanthe in the Garden


Some beautiful Chasmanthe plants at a local garden of palms and other tropicals.

Thursday, October 6, 2011

Firefly Bicycles: a True Story

Firefly Bicycles

In its two years of existence, Firefly has built over 200 bicycle frames in titanium, stainless steel and titanium-carbon - nearly every one of them documented from start to finish and shared over the internet with what seems like hoards of enthusiastic followers. This rate of productivity is particularly remarkable considering that Firefly is just 3 people: two framebuilders and a tester/designer, all of whom perform double duty as PR specialists and photographers.When I visited Firefly last week, they had just held an open house at their impressive new space in Dorchester. The recent upgrade from their prior digs will allow for even greater efficiency - helping the young company meet increasing demand and tackle their now 8-months long wait list.


Firefly Bicycles
To those unfamiliar with Firefly’s history, it may seem implausible that a brand-new maker of custom bicycles can hit the ground running with this degree of success. But the story makes more sense given their background. When Boston legend Independent Fabrication announced an impeding move to New Hampshire at the end of , most of their employees remained behind. Among them were friends Jamie Medeiros, Tyler Evans andKevin Wolfson, who decided to start their own venture. They developed a detailed business plan, Jamie and Tyler founded the company and hired Kevin, and on January 10, (at precisely 2:10pm, they tell me) Firefly was born. While the company itself was new, the skills and experience of those involved were considerable. At IF, Tyler had worked as a welder for over 13 years, Jamie for 14 years in R&D, and Kevin as a designer for 3 years. When Firefly announced they were open for business, orders began coming in straight away.


Firefly, D2R2
I first saw a Firefly bike at D2R2 last summer: two of them in fact. I remember it was an overcast morning, and when they rode past me I did a double take. While the bicycles themselves were quite minimalist, they were also unmissable: In the milky fog, their distinct graphics lit up in shades of green and violet much like ...well, fireflies. I noticed this again at the New England Builder's Ball last October: walking past Firefly's booth, their graphics flickered fetchingly in the dim light of the oddly cavernous showroom.


Firefly Bicycles
This "firefly" glow is in fact achieved fairly easily, through masked anodising. On titanium frames, different colours can be produced through anodising by controlling the voltage. The visual effect is surprisingly beautiful.


Firefly... More Pictures Coming!
The unpainted titanium with anodised graphics quickly became Firefly's signature look, though other finishes and materials are available.


Firefly Carbon-Titanium

Most recently, the other materials on offer include bonded Ti-carbon: frames with titanium sleeves and carbon fiber tubing. As Firefly puts it, this is "technology usually reserved for the companies with million dollar R&D budgets, used by a company of three."


Firefly Carbon-Titanium

As the guys strung up the bike for me to get a better look, my eye kept going back and forth over the top tube. Something looked odd. I soon realised it was the expanding diamater. The top tube starts out skinny at the seat cluster, then expands until it's fat at the headtube joint, with the titanium sleeves shaped accordingly.


Firefly Carbon-Titanium

Less noticeable, the same thing happens with the seat tube, which starts out fat at the bottom bracket, gradually tapering until it's skinny at the seat cluster.


Firefly Carbon-Titanium

Between the tapering tubes and the carbon-titanium interaction, the bike, when examined closely, looks like a puzzle box, or anM.C. Escher drawing come to life.


Firefly Carbon-Titanium

The Firefly logo is carved into every titanium sleeve, like a bit of lacy edging.


Firefly Carbon-Titanium

And fans of colourful anodising have not been forgotten.


Firefly Bicycles
Being around Jamie and Tyler is a bit like looking at the mixed-materials frame. Somehow they click, despite seeming so very different. Jamie Medeiros has an old-fashioned European face that would not be out of place in a Renaissance painting. A big guy with fluffy hair, he moves around softly, almost stealthily. He often seems lost in thought or amused by something. He smiles to himself as he works.


Firefly Bicycles
Tyler Evans has a sharp and direct gaze. His movements are precise and quick. No question I ask seems to surprise him or give him pause; he is articulate and focused.


Firefly Bicycles

Watching them together - interacting by the machines, or drinking coffee in the kitchen - there is a synergy that is as effective as it is endearing. They sometimes give the impression of speaking in unison, or finishing each other's sentences. When working in close proximity, their movements appear synchronised.


Firefly Bicycles

This could go some way toward explaining Firefly's productivity. The shop space is organised with a separate station, machine, and tool for every task, arranged in the sequence in which the work gets done. Jamie cuts, prepares and notches tubes. Tyler welds. The smart layout and the rapport between the pair ensure that the works gets done in an efficient sequence, with as little time and energy wasted as possible.


Firefly Bicycles

Kevin is not in on the day that of my visit (he is baking bread, they explain - a culinary course), but I've met him before at local events and know that he completes the synergy. He is missed and mentioned often, as Jamie and Tyler discuss the shop and the business. Kevin is the racer, and every prototype bike gets tested by him in action.


Firefly Bicycles

In Firefly's range of offerings there are no model names, only descriptions of bikes and frame materials. They can build road, cyclocross and mountain bikes, or anything in between, or something different entirely. Recently they made aclassic randonneurring bikewith 6550B wheels and front rack. They have made upright city bikes. When I playfully ask about step-through frames they assure me that they would welcome such an order.


Firefly Bicycles

Hanging up in the "to do" corner, I spot the fabled monster cross frame that belongs to a local customer.


Firefly Bicycles

It is in for seat stay modification, to allow for a 650B conversion (built for 26" wheels originally).


Firefly Bicycles

Firefly's beautiful dropouts are machined locally by Cantabrigian Mechanics.


Firefly Bicycles

A few other bikes lurk in the shop on the day of my visit. Tyler and Jamie's personal bikes are there, as well as a new road build for review in Australian Ride Magazine.Several frames sit in fixtures in states of near-completion. A well-ridden mountain bike, its frame anodised in brown, hangs by the door. None of the bikes are my size, which is just as well, since absorbing the new shop is more than enough for my senses this time around.


Firefly Bicycles

It's hard to describe Firefly's shop space without appearing to be gushing. The place is - quite deliberately - a showpiece of interior design. Upon moving into the new building, Firefly gutted everything and started from scratch, hiring designer Alessandra Mondolfi- who also happens to be Tyler's wife - to create an interior to suit the company's needs and business model.


Firefly Bicycles

Firefly's space was designed to serve three distinct functions: as a workshop conducive to efficient fabrication, as a showroom for customers, and as a promotional space for both process and product.


Firefly Bicycles

The open concept layout is arranged as a series of rooms separated with sliding doors. At the very back is the roomy shop space, laid out much like a factory floor. Leading up to it are an office space, an inhouse photo studio,


Firefly Bicycles

a fit studio,


Firefly Bicycles

a kitchen and meeting room,


Firefly Bicycles

And a dramatic entryway that also functions as a rotating art gallery (currently showing work from Heather McGrath).


Firefly Bicycles

Strategically placed sliding doors and windows can make every section as public or private as necessary.


Firefly Bicycles
But aside from how the space is organised functionally, there is also a branding aspect to the design. It is difficult to point a camera within the shop without getting at least a part of the Firefly logo in the shot. Virtually everything - from the welding setup, to the fit studio, to the kitchen - has been arranged with documentation and media visits in mind.


Firefly Bicycles
The lighting is photogenic and atmospheric. The shop doubles as a stage.


Firefly Bicycles

The colour orange is carried through into all aspects of the space, from bar stools


Firefly Bicycles

to machienery,


Firefly Bicycles

to plant life.


Firefly Bicycles

There are unexpected installations. The moss bed not only smells wonderful, but is a great stress reliever - petting it feels wonderfully relaxing.


Firefly Bicycles

A modest DJ setup for parties.


Firefly Bicycles

Bits of stained glass to enhance the light streaming through the small windows. I'll refrain from posting pictures of the bathroom, but the theme continues there as well.


Firefly Bicycles

In an era when creating a strong brand presence and culture around your work is crucial, Firefly's purposeful approach makes for a fascinating case study. It is unlikely that their success is a matter of mere luck.


Firefly Bicycles

They work on building bicycle frames around the clock, sharing the results with the world as they go along through activity onsocial media and bicycle forums, building a loyal and ever-expanding following.


Firefly Bicycles

From the get-go, this was a part of their business plan, and they have followed through as intended.


Firefly Bicycles

Can the market for custom bicycle frames in titanium, stainless steel and carbon fiber sustain Firefly's practice? Impossible to know what the future will bring, but at the moment it appears the answer is yes.


The Firefly showroom in Boston is open weekdays 9-5 (no appointment needed). And, of course, you can also follow along online. Many thanks to Firefly for the tour and the chat. More pictures of the visithere.