The idea of a bibbed pant is so old to me now that I am a not sure sure how I came to it.
Some where between a hike out Marble canyon from Deltaform in June of 1975 or coming down the cow path after doing PtarmiganRidge in single boots and the resultingfrozen feet that fall certainly had something to do with the thought process.
I do remember finally taking mywool knickers off and walking in my shorts as my thighs were bleeding by the end of thewet 25k hike out from Deltaform. My feet? Still an issue with cold today.
I've no doubt that the winter gear suggestions of British Alpinists Joe Tasker and Dick Renshaw in MOUNTAIN LIFE, August/September 1975 had a big impact on us after Ptarmigan Ridge.
http://coldthistle.blogspot.com//02/joe-tasker-and-dick-renshaw-english.html
Gwain, threedays out, after a harried retreat down through the ice fall on the north sideof Mt Deborah.
 By the spring of 1976 we were kitted in lightly insulated, nylon shelled,ski salopettes with minor modifications to make them climbing friendly. They worked great. Warmer than a normal pant set up while generally enabling you to drop a layer and on long trips and adistinct lack of another "waist". The harness is more than enough there.
By the early '80s many of the professionals working in the mtns around Banff were using a Swiss made wool/nylon blend salopette with cotton canvas reinforcements. The canvas dried slowly and wore quickly so just as common to cut the knee and butt reinforcements off pretty quickly. But the wonderful and warm wool stretchmaterial they used, the chest pocket, internal gaiter (which many just cut out as well) and side zipwere a glimpse as the future in technical mountain pants. It was the '80s so even my shoe laces matched butthese saloppetesreally rocked! Now way to get lost in a white outeither so big bonus points there for pictures.


Take it to the extreme and you get something like our friend Kim wore on the 1st ascent of the East Face of Everest in '83. And hewas back onKanchenjunga with themin 1985. Shown here. Fully insulated and Gortex salopettes by Wilderness Experience. Gregg Cronn photo of Kim on Kanchenjunga. "It's a magical thing with me. It's tough to stay in Kansas when you've been to Oz."(Kim Momb, 1956-1986)

As you might imaginea good pair of salopettes aren't what you would generally see on a day out cragging in Hyalite Canyon for example. The additional warmth and comfort of a pair of salopettes aren't a high priority when some actuallyput theircrampons on at in the parking lot.

The result of the "sport climbing" community inthe ice climbing environment is much of the gear and clothing gets dummied down (and I know people will just LOVE that)to fit the much bigger customer base. No longer a need for double boots, salopettes, or a small, super light weightclimbing pack if you are top roping or leading 50m climbs as the ultimate expression of the sport.
One of the main reasons I write the blog is to make others aware of what is out there for specialised gear and may be even reintroduce some old technology that has gone by the way side. that clearly should not have IMO.
Which is whyI beat the "light is right" campaign, double boots, specialised climbing sacs, better crampon fit/designs and now I am going to get deep into theclothing discussion in a number of up coming blogs posts.
One of the reasons those old red salopettes were so functional is that they were wool, they were a bit stretchy and they breathed well. Sounds pretty modern now for a piece of 30 year old kit doesn't it?
20 years on (2002)and leave it to Alteryx to come up with a better version. Those in the "know" searched them out promptly and bought the Alteryx Gamma Saloppeteand proceeded tolove them to death. Knownbutts I have seen well worn Arcteryx saloppetes on are Cosmin Andron, Steve Swenson, Wayne Wallace, Michael Layton and Bill Belcourt...and trust me I don't make a habit of looking at men's butts! I suspect there are more salopettes out there stashed away for that next "big" project. This was the last time I pulled mine out.


GCC photos below are courtesy of Ken Glover


 But the great thing about a correctly designed and sewn set of salopettes is they can be used for cold weather cragging just as easily as on anybig north face..

The Arcteryx Salopette reviewed by John Graham@ http://www.trailspace.com/gear/arcteryx/gamma-salopette/#reviews
January 1, 2002
"This one-piece sleeveless suit has power shield on the lower half and Schoeller fabric on the top, with nylon facing on the upper front. It zips all the way down the front and up the legs. It has removable knee pads that really save the arthritic knees. I wear this instead of bibs and it really comes into its own when exposed to the wind. It can get a little hot climbing steeply below treeline, but vents very well. I wear it with mid weight polypro bottoms and a power stretch top. When I hit treeline, I pair it with the Gamma SV and a balaclava and I'm good to go. Every detail is well thought out and of course the Arc'Tyrex fit is perfect, as usual."
John's comments are prettymuchas I found my own pair of Gamma Saloppetes.

Arcteryx Gamma Salopettes design details:
Designed for mountaineering applications, this breathable garment sheds snow and provides liberating stretch. Special features include removable kneepads and through-the-crotch WaterTight zips.
Features:
Adjustable cuff shock cord
Breathable, wind and water resistant
Four way polyester stretch upper
Internal knee pad pockets
Keprotec instep patches
Removable molded EVA foam kneepads
Stretch woven lower
Two chest pockets with laminated zips
WaterTight side and through-the-crotch zips
Materials:
Polartec Power Shield
Rentex Lofted Lycra
Schoeller Keprotec
It doesn't take much imagination to see that salopettes are a pretty specialised piece of kit and not the best in warm weather. Additionallyif you are using a soft shell material like my original wool blend Swiss salopettes or the more recentArcteryx Gamma how warm do you want to make them, at the risk of making them too warm?
With all the new wonder fabrics and some good design work one would think you could make an almost perfect climbing salopette these days. Likely the biggest *trick* to that would be getting someone that was willing to design with no compromise. No fufu ski fashions or snow board shreddersneeded here. How about for once just a honest to GOD climbing salopette? Justas Tasker and Renshaw first envisionedthem 35 years ago while climbing the hardest North faces in the Alps, mid winter?
I'd pony up some cash for a couple pair of those!
Enter Bill Almos and his start up climbing clothing company NWAlpine. http://nwalpine.com/
Bill is, if nothing else, an alpine climber himself. And willing to take risks.
So when we first talked about light weight pile hoodies and Shoeller style alpine climbing pants we were talking mostly the same language. I'm old so I am not sure what he thought of a "new" old pant idea as a NWAlpine offering. But he didn't say no. So I boxed my last two remaining pair of salopettes up and off to Portland they went. Having never met Bill or owned any NWAlpine clothing (I own several now items now) I wondered for a moment or twoif I wouldever actually see my original and much lovedsalopettes again. Similar things have happened in the past. Same situation and sadly, most unreliable people.
Not so this time!
SoBill and I beganbrain storming via emails,what would we do to make a better *alpine climbing* specific bib? It was a short storm. I wanted a bib that would be warm enough,if a little cool for Alaska in the spring. Hopefully theywouldbe fine for most things if you could move quickly in the Rockies or Alps in winter. And a plenty warm pant for anything in the lower 48. Again, specifically for winter orcold alpine climbs. Ptarmigan Ridge on Rainier or anything in theColumbia Icefields in Oct or Febwas the environment I envisioned.
I am doing much of my own climbing in a pair of Arcteyx Gamma LT pants these days and s single pair of mid weight Costco long johns. I won't kid anyone, at times it is just barely enough when the temps drop below -10C or a nasty cold wind picks up. But going on the theory that cool muscles work more efficiently..so far it has been enough. But for a new pair of Saloppetes I wanted just a bit more. Not as much as the last Arcteryx Gamma MX salopettes mind you. They were more akin to the current Gamma MX pants (Polartec® Power Shield®) which is lightlyinsulated. But I wantedthese to be some where just short of that extra insulationand lighter in over all weight. MUCH, muchlighter,and way less complicated. Less zippers, less pockets for sure, but still a usable. The idea was alwt climbing pant where just the additional bib will add some warmth by design without adding weight. One less belt at the waist line and more comfort was the goal.
Weight comparisons?
ARC Gamma Lt large 12.4 oz
H. Ridge Runner 3/4 16oz
ARC Gamma MX large 19oz
NWAlpine salopettes large 21.6oz
ARC Gamma MX salopettes large 30.4oz
I have to admit "formal", as in basic black, climbing pantsis getting old.
"My" salopettes need to be warm, wind proof, extremely breathable on the upper bib portion, breathable enough in the leg and waistand all made of a 4 way stretch fabric. No baggy legs to snag crampons on, hardcore anddurablepatches of some typeon the lower inside of the calf for when you will eventuallysnag a crampon. Turned over double hemmed cuffs for "gaiter" durability. Simple eyelets for elastic cord to snug down your "pant gaiter". Simple. Succinct. Specific.
Reinforced inside of the leg for cramponsand simple gaiter grommets

Cuffed hems to reinforce the bungee gaiter strap and seal the leg's gaiter, which were designed up front to take a big dbl boot like the La Sportiva Spantik.

A THREE slider, chest and crotch,water resistant zipper. For the call of nature, ventilation and getting in and out of the garment. Easiest pee portal in the world with a harness on. Easy for me and I suspect even better for a woman.

Hey, no laughing here! This is a hard photo topost in public let alone take by yourself! Zipper runsfrom sternumto tailbone.

NWAlpinist Salopette details:
Suggested Retail is $250 sizes XS through XL
The first production run will be presold. via the NWAlpine web site
http://nwalpine.com/
Everyone in the industry these days is using either a proprietary material orsomething from Polartec and/or Shoeller. almost no one is sewing in the USA. These bibs are proudly sewn in Portland Oregon.
The pant material currently in the NWAlpinist Saloppetes is a proprietary material.Bill is already prepared to change the material and still keep the quality if the original supply can't keep up with demand after the first production run.Currently the pant is made of aa high quality four-way stretch, woven, breathable softshell fabric with aabrasion resistant face with DWR coating. The usual suspects use exactly the same material at the moment. Your imagination won't have to roam far to imaginethis material.

The upper fabric of the bibis a "micro denier fleece back lycra". My thought is, it is perfect for the job. And I am reallypicky here because the upper material has to breath extremely well to make the salopette idea work like it needs to. (SAG's)Merino wool hoody shown in the photo as well. More on it lower down the page.

Trust me, this light weight bib top is breathable. It is likely the first thing you'll notice if youtry to use these Salopettes without enough insulation on your upper body as I did. You'll likely not make that mistake twice.
How the upper body fits in the shoulders, armsand around the neck defines how salopettes fit in many ways...these are exceptional on me.


There is a couple of things that become glaringly obvious when you are 50+ and modeling a one piece lycra suit. The first, much to my surprise you know, is I obviously aint a flat bellied stallion no more...no more :) No hiding that one from a camera. But being shaped more like a Pear(as in fruit) also tells me a lot about how well these salopettes might fit, shall we say, amore athleticproportioned climber. They should fit normal climbers exceptionally well. I have a 21" back which is pretty long for my height @ 6'1". So the typical issues andwhere you will have a problem, of not having enough length in the body andhaving "crotch bite" or baggy pants, shouldn't be a problem for most with this pattern. Mine are a "Large" and me fit perfectly..well close, if I suck in the Pear anyway.
This is how I see myself......a long lean climbing machine. It iswhat I can't see that maybe a problem with that glorified self image :)

"A designer knows he has achievedperfection not when there is nothing to add but when there is nothing left to take away" Antoine de Saint-Exupery
Wind, Sand and Stars (French title:Terre des hommes (Land of Men))by Antoine de Saint Exupéry published in 1939
I suspectthe next question is how do you layer under and over salopettes. No question it is a learned skill. The firstpictures of this blog show Gwain in the mid '70s with several light layers inside and a wool shirt on the out side. These days most of our mid layers have snug hems. You don't need to tuck everything in and you'll stay warmer in many cases by not doing so with Salopettes. So nothing has really changed. Just the upper insulation garments have gotten even better and easier to use with Salopettes. My current "go to pieces" for the upper body (with salopettes or pants) are the super light weight Sherpa Adventure Gear (SAG)Merino wool hoody shown in the pictures above, called the "Khushi" (it is a must have). Or the NWAlpine LT Hoody (another must have). Next up is the RI Hoody or the SAG "Tchimi"hoody or again the NWAlpine Black Spider Hoody.
All light weight hoodies suggested here with only the amount of insulation and how well they breath changes for the project, the level of effort involved and temps.
Next up? Lots of mid layer pile pieces to choose from but one I am thrilled with, especially if you are usingsalopettes, is the Sherpa Adventure Gear sweater made of of Merino wool armsand Primaloft One body. It is called the "Mantra".
It adifferent pieceand you'll likely need to figure out if it will work for your system. I really like lightto mid weight Merino wool sweaters with full or half zip for climbings. I buy them at Men's Warehouse on sale and literally wear them untill I have holes in them.So the Matra fits right in and adds some extra warmth with less weight in the Primaloft 1 body. But more importantly the Primaloft One is much easier to dry out than wool and looses only a tiny bit of its insulation values when wet. A hood would make the men's Mantramuch more user friendly for hard climbing. It is a truly dapper casual, around town, garment that I use climbing without a hood. But I'dreallylike to have both as an option! If you think so too let Sherpa Adventure Gear know! I'll buy the first.
I am a big hoody fan. If you are a woman the Mantracomes with a hood in thewomen's verion. I can't imagine a better winter climbing system than a pair of NWAlpinist salopettes and the "Kushi" mated up with Mantra hoody and one or bothof theArcteryx's Atom LT and Atom SV jackets. San's that hood itis my current system. And damn..I'll be looking simply dapper in the Chamonix bar scene in that black (hid the spare tire)Mantra! The woman's Mantra is good enough I bought my wife one...and she is NEVERgoing to alpineclimb. She calls me a "girl" quite a lot so may be I doknow something about women's clothing :)
I'll have to ask.
I have another blog started on hoodies, light and mid weights, and how they fit into my systems along with my pant and base layer choices.But I wanted to give the basics of what I use with salopettes as many have likely never used a pair climbing.
http://www.sherpaadventuregear.com/index.php
http://nwalpine.com/
http://www.arcteryx.com/?EN
And if you wondered? I have no financial connection to NWAlpine but I did come up with the name


 When I started having problems with the width of the Brooks B17 on my roadbike, I received many excellent suggestions from readers. I also received a suggestion from several staff members at Harris Cyclery: a Gilles Berthoud. Bethoud saddles and luggage are made in France and are associated with exquisite randonneuring bicycles. It is generally agreed that their handlebar bags are the finest one can get, and several respected members of the industry describe the saddles as being "even better" than Brooks. However, I was both skeptical of that description and weary of the high price tag. When I returned to Harris Cyclery the following week, I still had not decided what saddle to get, and they suggested that Itry the Berthoud and see what I think. So I now have the saddle on loan, and have ridden with it on my Bianchi roadbike.
 The saddle I have is aGilles Berthoudtouring model, which is available in three different colours (black, natural and cork), with regular or titanium rails, and in either a man's or a woman's length. Mine is the woman's version, which is the same width as the men's (160mm), but with a shorter nose. You can read the detailed specs for these saddleshere. The woman's model is called the "Marie Blanque"- after a short, steep climb in the French Pyrenees.
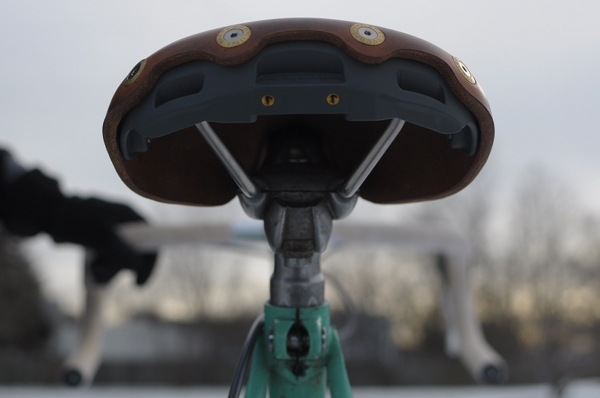 The undercarriage consists of metal rails combined with apolycarbonate (plastic) rear support, which accommodates the proprietary Berthoud "Klikfix" saddlebag attachments. The openings can probably also be used with standard saddlebag straps, though I have not yet tried to attach one. This aspect is where the Berthoud saddles receive most of their criticism: "Not only is the saddle more expensive, but it has plastic parts?" However, both Berthoud and fans of the saddle insist that this construction method is superior in terms of comfort and adjustment possibilities, and is not prone to failure. I am cautiously open-minded on this, and would be curious to know the statistics of Brooks vs Berthoud saddle failure.
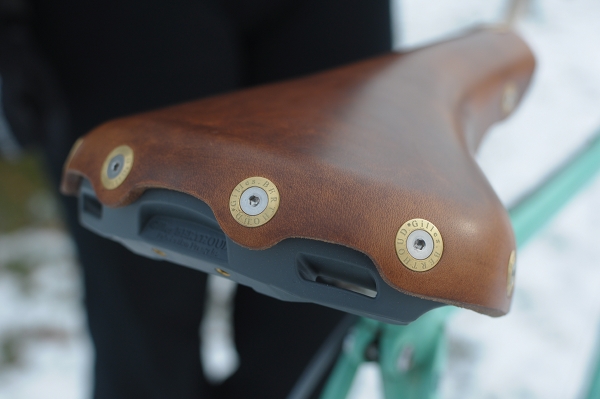 Another distinct feature of the Berthoud's design, is that the bolts (not rivets) are located behind and below the surface of the saddle - so that the cyclist's rear end does not come in contact with them no matter how far back they sit. This will make a huge difference to those who are bothered by the texture of the rivets on other leather saddles.
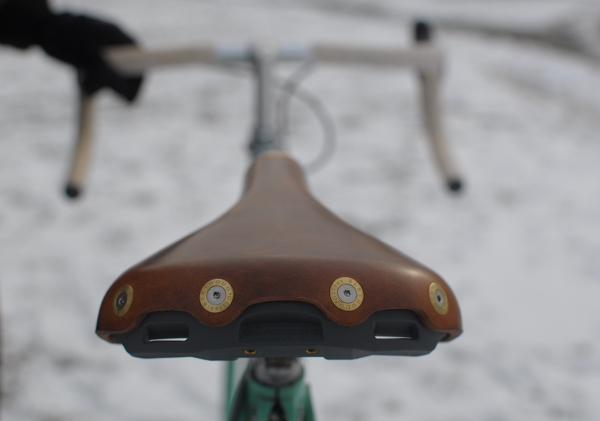 Finally, the very shape of the saddle is different than what I have gotten used to from Brooks. The Berthoud's surface platform is completely flat, whereas the surface of Brooks has "undulations" to it (some call it the "banana shape"). As a result, the Berthoud works best when mounted completely level - whereas I mount the Brooks with the nose pointing slightly up, in order to not slide forward.
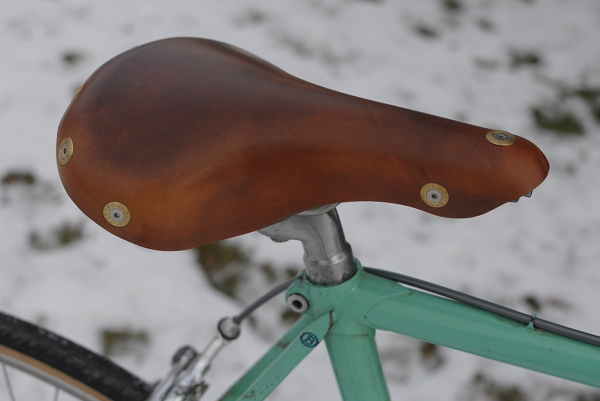 An additional difference, is the Berthoud's relative lack of "side skirts" (compare it to the Brookshere). Despite being classified as a touring saddle, the leather on the Berthoud is closely trimmed along the sides - typical of a much more aggressive saddle in the Brooks range.
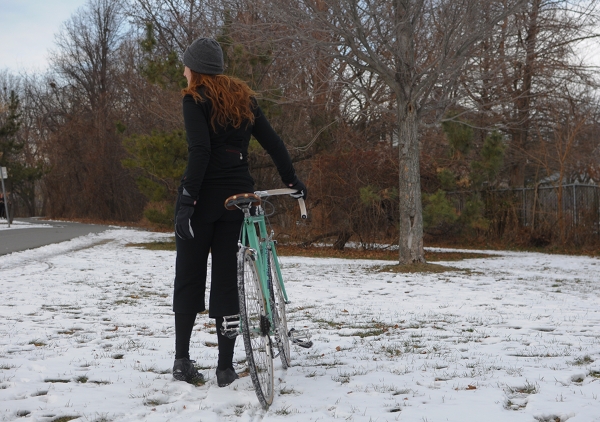 My experience riding on the Berthoud is limited to a short (12 miles or so) winter ride, but here are my impressions so far: The saddle felt "just right" out of the box and I simply forgot about it once I got on the bike and began cycling (no padded shorts). Because the Bianchiis a bit big on me, I am leaned forward on it considerably. The saddle did not feel too wide (it is 10mm narrower than a lady's Brooks B17) and my legs did not rub against the "side skirts". Because the Berthoud is level, the nose does not come into contact with any sensitive areas. With Brooks road saddles, I need to make a lot of adjustments to get this aspect just right - but the Berthoud seems to naturally stay away from that region. As I was cycling, I was not so much experiencing any of this, as not experiencing anything. I was taken with the winter scenery and genuinely forgot that I was supposed to be trying the saddle and forming impressions of it. There were no impressions, and only later did I realise that this in itself meant that the saddle was comfortable.
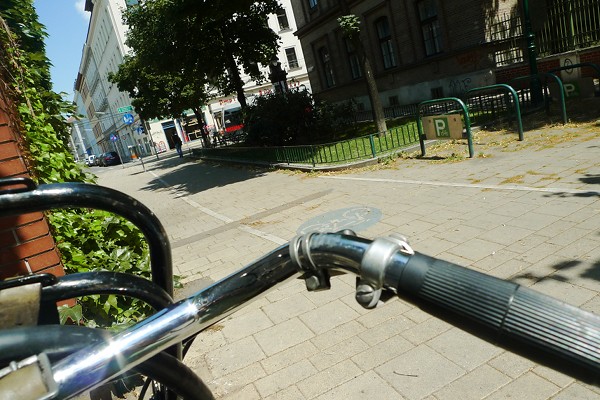 This is the first time when my stay in Austria involved cycling from beginning to end - without relying on public transport for any reason. And a curious thing has been happening: everywhere I go, I am always early!
 I am a moderately punctual person, but definitely not someone who is obsessed with arriving "on the dot," let alone ahead of time. So why was this suddenly happening? Then it hit me: After living in Vienna on and off for 3 years now, I've developed an internal "estimator" of how long it will take me to get to any given location in the city - based on my experiences with the U-Bahn (subway) and trolley systems here. Even though I cycle now, my internal time estimator has not adjusted yet and still functions based on "public transport time" - making me always early, because it is actually