Monday, June 28, 2010

Anniversary Celebration


This year we got to celebrate our wedding anniversary here in The Villages. Which means we did not have to go far or work hard to make it a fun day. We started out with a lazy morning, hanging out at the house with Ava. Then we headed out to Spanish Springs for a movie.


I have wanted to see "The Heat" since I saw a movie promo a few months ago when we were in Virginia. I love Sandra Bullock and Melissa McCarthy is really funny too. I was hoping this would be as funny as it looked in the trailers. I'm happy to report that it was. Nathan is a hard sell when it comes to comedy and he said as we left, "Most movies have some funny parts. That movie was funny the entire movie". So I guess that means we both gave it two thumbs up.


After the movie, we walked around the Square for a bit, headed over to the Ay Jalisco for a plate of chicken nachos and then drove over to Orange Blossom so Nathan could see the houses over there. I am telling him how much I would enjoy having a house here. He is ignoring me so far!


Next we headed south to the Havana Country Club. I heard about this place online, but then had a first hand recommendation while sitting on the bench at pickleball yesterday morning. The woman who had visited there said the food was ok but the experience was really unique. They have a singing waitstaff there. So we invited Rich and Donna and made reservations to see if it was as neat as she said.


We were seated right away when we entered and I noticed we were right next to the piano, which I was hoping meant we would be in the middle of the entertainment. As it turns out, the waiters and waitresses moved around while singing, so there was not a bad seat in the house. So how was it? I'm happy to report that this place was another win! We all enjoyed it, including the guys. Our waitress, Veronica, was wonderful. We all enjoyed our food. It was much better than ok. And the singing was top notch, with some very talented people entertaining us.


Donna has nice pictures and descriptions of the food on her blog here: Florida Picklers The portions were big enough that I brought home half my meal, to enjoy for lunch the next day. It was loud while the singers were performing, but there were breaks in between songs, so dinner conversation was still possible. I really enjoyed our time there and it made it a nice treat for our anniversary.


While we were leaving, I was snapping pictures of the outside when a gentleman asked if I was trying to get a picture of him. I told him that I sure was, so he posed for me.


The rest of his party was as amused by him as I was. What a fun group!


We had a wonderful day, and it was made even better by sharing it with special friends. Happy Anniversary honey! Here's hoping for many more years together!


Sunday, June 27, 2010

5-Speed Conversion!

My conversion of the Mercier mixte to a 5-speed is pretty much complete, and it worked out nicely. I've received some questions about the process since I first mentioned my plan to do this, so I include answers to these questions here.

What is a 5-Speed Conversion?
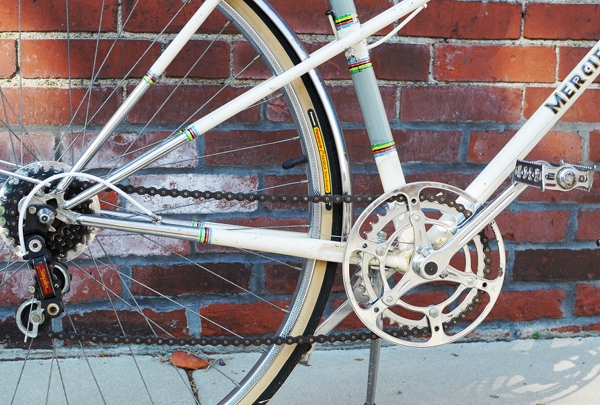
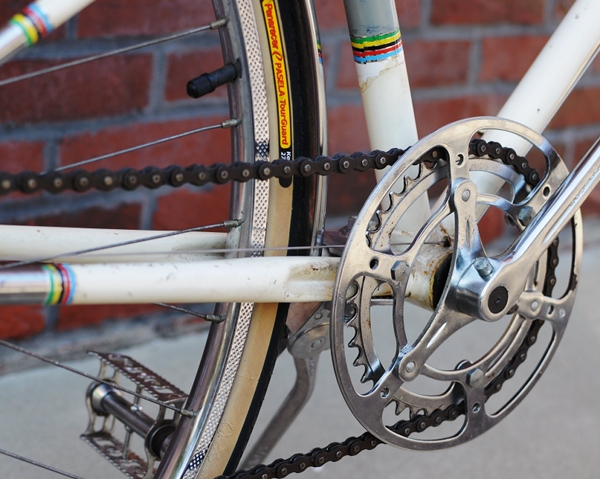
A 5-speed conversion refers to transforming a vintage 10-speed bicycle into a 5-speed by removing one of the two front chainrings and the front derailleur system (see before and after pictures above). In the end, the bicycle is left with a much simpler set-up of 5 chainrings in the rear, 1 chainring in the front, and a single gear shifter. It works much the same as a 5-speed hub, only the gears are visible rather than hidden inside the hub.

Why do this? Doesn't it mean you have fewer speeds now?
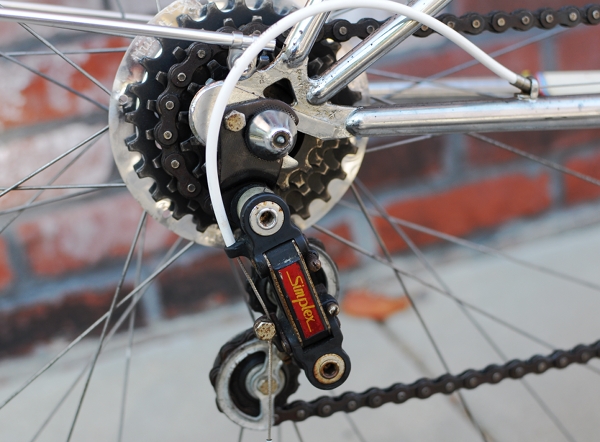
Hard question to answer, but I will try: The advantage of a derailleur over an internal hub, is that it allows for much wider spaced gearing. Riding the Mercier around hilly areas, I can get by perfectly well with just the middle 3 rear gears. The 2 extra rear chainrings provide a nice "just in case" buffer of one higher and one lower gear than I'd ever need, but the second front ring (which provides 5 additional speeds) and the whole front derailleur system (which switches between the two front rings) are useless entirely in the context of where and how I plan to ride this bike. Given my certainty of this, converting it to a 5-speed made sense, because it would simplify the handling of the bicycle and it would get rid of extraneous components. Also, this bike (as many older French bicycles) was originally designed to have a rear-only derailleur system. This is evident, because it has a braze-on (on the downtube) for just a single gear shifter. So converting it to a 5-speed reverts to a traditional design.

If you're going to make it a 5-speed, why not use a 5-speed hub and ditch the derailleur system all together?
The main reason, is that no existing 5-speed hub could give me the same customised, wide spacing as a 5-speed rear derailleur. It's not just about how many speeds you have, but how useful each of those speeds are. Additionally, it would cost a ton of money to rebuild the rear wheel with a 5-speed hub, whereas the 5-speed derailleur conversion was inexpensive. And finally, I am trying to keep this bicycle fitted with traditional components, and French bicycles were traditionally fitted with derailleurs.

How was the conversion done?
Keeping in mind that the process will differ depending on your current set-up, here is what generally needs to be done, step-by-step:

1. Front chainring removal
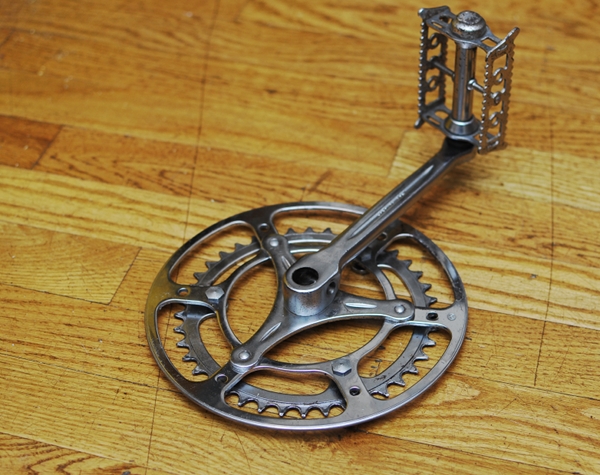
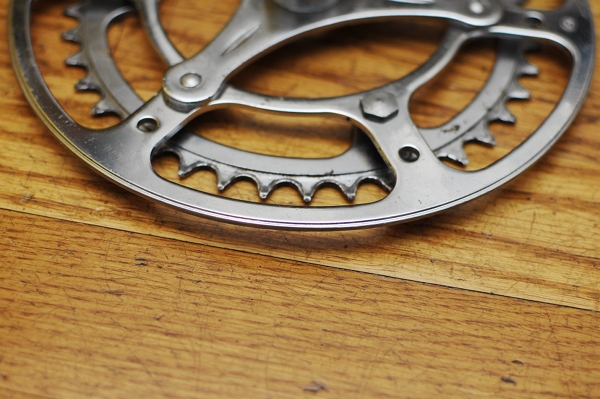
Since you will only have one chainring in the front now, you need to figure out how to get rid of the second one. The main issue here has to do with how the crank arm is attached to the ring(s). On some bicycles, it is possible to simply remove the extraneous chainring and the remaining chainring will hold up the crank. On my Mercier, the two rings are a unit, attached to the crank via a proprietary bolt system. To make a long story short, we could not simply remove the extra ring. Rather than get an entire new chainring and crank system, it occured to me that perhaps the teeth on the bigger chainring could be filed off - turning the ring into a chainguard. I discussed the idea with metalworker and bicycle mechanic Jon Gehman, who is a reader of this blog, and he agreed that this was a good way to go. I then sent him the chainring for a "de-toothing" service, and he did a spectacular job.

Here is a close-up of what was formerly the larger chainring. Notice how beautifully the edge is done - giving it a professionally finished look.

2. Front derailleur removal
This was the easiest part. The Simplex front derailleur simply unbolts and removes. On the picture above you can see that the rainbow decal is a little worn where it used to be, but that is all.

3. Changing the shifters
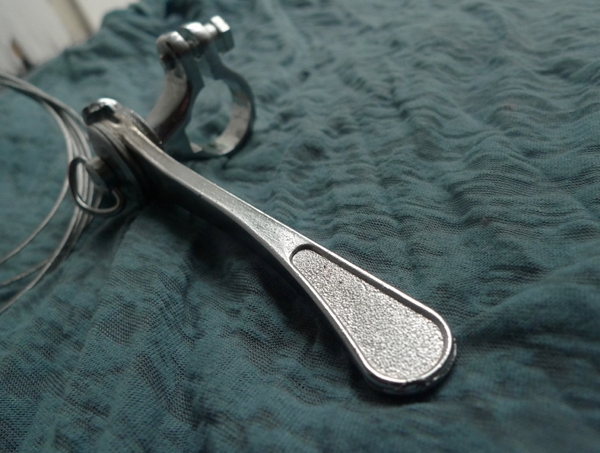
The ease or difficulty of this step depends entirely on what sort of shifters you have to begin with. If your bicycle has separate (unconnected) shifters for the rear and front derailleurs, then you simply remove the one that controls the front and you are done. If your shifters are a unit, then you will have to remove them and install a single shifter instead. Above is a vintage Huret single shifter for mounting on the stem that I bought for this purpose. It's beautiful, "period-correct", and can be bought fairly inexpensively. The Co-Habitant installed the shifter and connected the cable to the derailleur.

Here is the Huret shifter installed on the stem. I am not 100% sure though that this is the ultimate solution. Originally, the Mercier had downtube shifters, and this is where the single braze-on is located. However, I do not understand how one is supposed to use downtube shifters on a near-upright bicycle. At least for me, and in traffic, they were too much to handle - especially given that the shifting has to be done with the right hand.

So now there is a cable stopper where the downtube braze-on is, and the cable then extends further to the stem. Though the Huret shifter is beautiful on its own, I am not sure how fitting it is here. For instance, the reason it is not all the way at the bottom of the stem, is that placing it here makes it hit the handlebar when it is moved all the way forward. Hmm, right? Your thoughts on this welcome.

Overall I am thrilled with the 5-speed conversion. The Mercier is light, easier than ever to handle, and now ready for its fate as Studio Bike. I admit that I am reluctant to send it over to the Studio and quite like having it here at home. But I also look forward to exploring a new neighborhood together... and to having less bike clutter in our apartment!

Friday, June 25, 2010

Off to Porto!

Ola! I am going on a solo trip to Porto, Portugal... in just a few hours.


Flag and Coat of Arms of Porto.


The fiery flag of Portugal


Looking forward to spending my Easter there.


Sunday, June 20, 2010

Such a Flirt!


Each time we visit the Wildlife Refuge, the ostriches amuse me. They can be busy doing whatever, and when they see us they always make their way over to the fence. Which is quite different than every other animal there.


They remind me of Ambir when she was young because they just move closer and closer posing for the camera.


And with their beautiful lashes, they end up looking like quite the flirt! I'm ready for my close up, Mr. Deville!


Living the life in Florida!

Saturday, June 19, 2010

Winter, dry, both or none?


Obviously, the dry tooling route I did on the CIC cascades under the Ben Nevis north face last week was going to provoke a bit of debate. In my mind it’s perfectly suited to climbing in this style and it’s no threat to the traditional Scottish winter routes because it’s so clearly different from them. It did make me wince when I saw UKclimbing.com include a Scottish winter grade in their headline reporting the route. I didn’t give it a Scottish grade for a good reason! I should have seen that coming I guess, although it was hard to foresee that a casual comment by me comparing it to a similar piece of climbing terrain with a winter grade would mean folk would then take this one as a winter route. A bit like saying an E8 trad route has 7c+ climbing - it’s still different from a bolted 7c+! This seemed to fuel a bit of debate about how it related to the traditional winter climbing game. To me, it’s totally clear the route is a tooling route, not a Scottish winter route. Clear and simple.


Some folk argued that maybe it should be left alone in case it dilutes the Scottish winter conditions ethic. I personally don’t agree with this. My feeling is that a one size fits all ethic for anything climbed is unnecessarily simplistic. It’s a shame not to climb that crack just because it doesn’t get rimed up. It’s an excellent climb.


More so than any other climbing discipline, Scottish winter climbing seems to be awful scared of losing what we have. Of course it’s special and worth defending. Perhaps because I like going for the steepest routes I’ve spent more than my fair share of days walking in and turning on my heel because the project is not white enough. It’s natural to resist any changes (even if they are only additions) to the status quo, but not always good. Balanced against the fear of losing what we have must be a fear of losing what we could have. To me, the diversity of British climbing has always been it’s greatest asset. A strict and narrow focus on what can be climbed with tools is a strength in upholding a strong ethic, but a weakness in undermining the diversity of climbs that can be done. I just don’t see that the threat to the Scottish conditions ethic is real. Rather than diminished over the years I have been a climber, I feel it has strengthened. The ethic is so strong, it has room to accept some ‘outliers’. However, that is of course just an opinion of one and may be outweighed by those of others, which is no problem. If other folk thought the tooling route was a good idea, very few have come out and said so.


Winter condition or not? What do you think?


A further interesting twist came when the other new route I wrote about (The Snotter) was questioned for not being in winter condition. I must say that took me seriously by surprise. I’ve done plenty of mixed routes that were on the borderline, but it didn’t enter my head that this one wasn’t in good condition. Simon Richardson wrote a particularly below the belt post on his blog which is here. For some reason he didn’t mention my name in it, and is was a little weird that he wrote such strong words and then reported another new route of mine in the very next post. Anyway, the reason it took me so by surprise was the focus on the section of overhanging wall to get between the ice grooves below and the hanging icicle above. I deliberately went on the route because the recent sunny conditions has been good for helping the grooves below the icicles to become iced. In the 55 metre crux pitch, around 47 metres was climbed on water ice, with 6 metres crossing a grossly overhanging wall underneath the roof to get to the icicle. The 30 metres of grooves below the roof were climbed on ice, initially stepped iced slabby ledges, then a thin ice smeared rib and groove, apart from a few hooks on the right of the ice. Once on the icicle, there was a long section (15 metres at least) before the angle even started to lie back.The downside of this mix of conditions was that the overhanging wall itself was pretty dry. My thinking was that this is par for the course for this type of route. The sun helps more ice form, but at the expense of the rime. My interpretation (which may be ‘wrong’ if such a judgement can truly be made) of Scottish winter conditions is that basically the route must be wintery in appearance. If it was nearly all dry mixed with a little ice, it would be outside that definition and I would have come back another time. But the reality was the pitch was nearly all ice with a short section of dry rock.


A central view in my own new route climbing has always been that I don’t want it to be at the expense of anyone else, even if I don’t agree with their position or motives. Clearly, some folk feel that way. So I have taken away my blog post about the routes and recommend that folk forget about them, if that is what they want to do. They still exist of course, in my memory as great days out and two of the most fun climbs I’ve done in a while. Nothing more ultimately matters. Anyone else is welcome to climb them as first ascents if they feel those ascents are more worthy.


Snow Drifts on Hungry Jack Lake


Here is another shot from my afternoon along the Gunflint Trail yesterday. This was taken with my Canon 100-400mm lens from the Honeymoon Bluff overlook.

Tuesday, June 15, 2010

The Little Blue Shack

Every time I went to the restroom while staying at the Homer Spit Campground, I passed by this little blue shack that was covered with interesting items (for lack of a better term). It seems to be the thing to do in Alaska – odds and ends of fishing and boating and other paraphernalia can be seen hanging from all manner of buildings. But the color of this little building stood out amongst the others.

And each time I passed by I wanted to stop and take some pictures, but the weather just wasn't cooperative and the lighting wasn't right – until Saturday morning (August 14th).


Monday, June 14, 2010

Weekend Project

We have not really changed anything in our RV since we bought it. We have more than made up for that now though. When we bought the RV, we bought it toaccommodatefive of us. Now there are three of us. Soon there will be two of us.


Our needs have changed, so we have tossed around the idea of getting a different RV when Austin left home. I would like a smaller RV. Nathan would like a less expensive RV. But we also love the RV we have.


Jack and Ruth that we became friends with this summer inspired us to think outside the box and make our current RV something we'd love. So we decided instead of having three bedrooms and one and a half baths that we would now have two big bedrooms and one bathroom. When Austin leaves home, we can use his bedroom for Nathan's office.


It was a lot of hard work on the guy's part this weekend, helping to make these changes. I caught a few shots in the midst of the tearing the walls down. Nathan, who hates all kinds of physical labor, so give him a big hand:


And the room with the walls tore out and the bathroom almost "gone".


Whew! What a mess! I spent today cleaning up and sorting through stuff, which led to many bags of goodies to be donated. It's funny, we think we live so light now given all we own fits in our RV. But each time I go through our things we find more and more that we don't really need. The longer we live this way, the lighter we want to live. But we also accumulate gadgets and gizmos along the way so we are far from cured when it comes to consumerism.


I will try to remember to snap some pictures when we have the room finished and decorated the way Austin wants to.


A Look at Rivet Saddles

Rivet Saddles

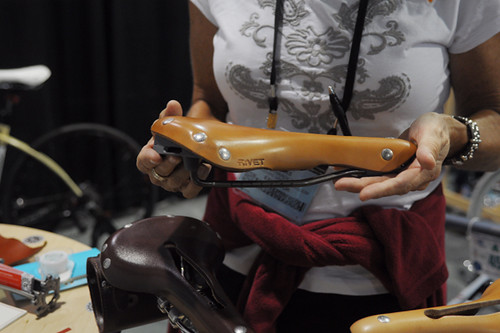
When I last corresponded with Debra Banks, she was off to ride the Texas Rando Stampede 1200 - a 750 mile brevet that she would go on to complete in 85 hours. Naturally Deb did this on a Rivet: a waterproof, slotted leather saddle of her own design.


While Rivet saddles are fairly new to the scene, Deb's experience in the industry goes back to her time at Selle Anatomica. In her own words:

Tom Milton, the founder of Selle An-Atomica was my sweetie and after his untimely death, I ran SAA for a year while his estate was being settled. His family took over the company and I ventured out on my own to form Rivet Cycle Works.


Rivet Saddles

At the moment, Rivet offers three basic models of saddles in different widths. Each is available in a range of colours, and with a choice of cro-moly or titanium rails. We discussed my trying one for review and settled on the Pearl.


Rivet Pearl Saddle

Named after Pearl Pass in the Rocky Mountains, the Rivet Pearl saddle was optimised for long distance comfort and support. As Debra explains, this does not mean these saddles are solely for long distance riders. Rather, if a cyclist experiences saddle discomfort when attempting longer rides, it was designed with addressing this in mind. The Pearl model features bag loops for attaching a full sized saddlebag.


Rivet Pearl Saddle

Measuring 170mm at the rear, the width of the Pearl is equivalent to that of Selle Anatomica saddles. However, the shape and structure are quite different. In fact, while Rivet saddles may invite comparisons to Selle Anatomica because of the shared history, I find them to have more differences than similarities. The list of similarities is short: Both are slotted, and both are made of waterproofed leather in largely the same range of colours. However, the form and feel have little in common.


Rivet Pearl Saddle

The first thing I noticed about the Pearl before fitting it on my bike was how tall it was. The height, or depth of a saddle is not a spec that all manufacturerslist, but it matters. While the Pearl's leather upper is in itself shallow, the rails are pretty deep. Installing it in place of my Berthoud Touring saddle, my seatpost had to be lowered almost a full cm to compensate. Selle Anatomica saddles are even shallower than Berthoud, so the difference there would be greater still. I am not comfortable providing exact figures, because height is difficult to measure and I don't want to misinform. But basically it's Selle Anatomica < Berthoud Touring < Rivet Pearl, with just under 1cm of difference in height between each.


Rivet Pearl Saddle

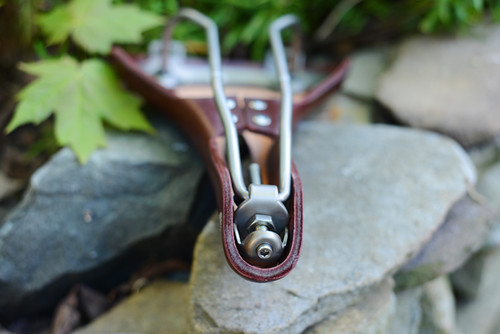
It occurs to me that the purpose of the deep rail design on the Pearl might be to avoid any chance of the leather hitting the rails should it stretch over time. There is certainly no danger of that.The wrap-around tab on the underside further reduces tension loss.


Rivet Pearl Saddle

According to Debra, Rivet saddles can take about 300 miles to break in, during which time they may also stretch. The tension screw should be used to regulate tension - not just in the event of stretching, but also to find the tension that works best for the rider's anatomy.


Rivet Pearl Saddle

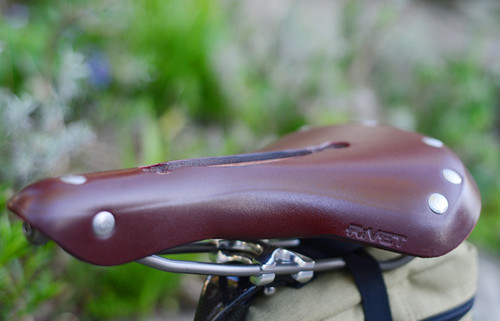
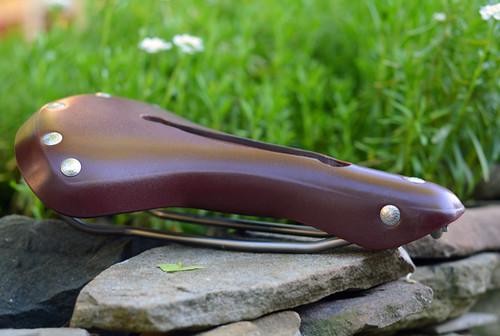
The purpose of the slot on Rivet saddles is "to relieve pressure and help to re-distribute pressure to other areas, depending on how the rider sits on the saddle." The Rivet slot is a bit longer than the slot on the Brooks Imperial line of saddles, and considerably shorter than Selle Anatomica's.


Rivet Pearl Saddle

The edges of the Pearl's sitting surface are crisply delineated, rather than rounded, which gives it a sculptural look. The "R"-embossed rivets add textural interest. The Burgundy colour, pictured here, is a deep brown with a magenta tint (and, from what I can tell, identical to Selle Anatomica's Mahogany).


Rivet Pearl Saddle

For waterproofing, a chemical agent is mixed into the tanning process (a different process than what is used for vegetable tanned leather). To increase firmness and minimise sagging, a second layer of leather is laminated to the upper piece. The leather for Rivet is sourced from Wisconsin, then sent to Taiwan, where the saddles are made by a master craftsman. Rails and other frame parts are sourced from Taiwan. The saddles are assembled there and then shipped worldwide.


Rivet Pearl Saddle


With the demo Pearl on my roadbike, I rode around the neighbourhood and determined that the standard (highest) tension felt pretty good. The rear felt just about right at my sitbones. The transition from rear to nose felt just a tad wider than what I normally ride. With this initial assessment I felt comfortable enough to try a long ride.


I tested the Pearl on an informal 100K. Including my ride to and from, it was an 87 mile day in the saddle. For me, the Pearl out of the box did not require a break-in period. I experienced no soreness over the course of this distance. The leather felt quite stiff, but suppler than my hard-as-a-rock Berthoud. Compared to a Selle Anatomica, the "hammocking" action was subtle, and I could not discern independent movement between the two sides separated by the slot.The curvature and surface of the Pearl's rear felt very comfortable as the miles rolled on. Once in a while I could feel the ridges of the slot toward the front. It was not enough to cause chafing in the course of the distance I did, but I wanted to note that I could feel them. What did cause chafing - and this started around mile 60 - were the sides of the saddle in that transitional part that tapers toward the nose. Given the location and nature of the chafing, this was not a breaking-in issue or a tension issue, but a structural issue - the Pearl model is slightly too wide for me in the rear-to-nose transition, which caused chafing to my inner thighs over time. Having received my feedback, Debra agrees with this diagnosis and suggests I try the narrower Independence model to compare.


Rivet Saddles

As we all know, preferences in saddle shape, size and feel are highly personal. It is always good to have options and variety. Designed by an experienced randonneuse, the saddles from Rivet Cycle Works are a welcome addition to Brooks, Berthoud and Selle Anatomica. The Pearl model is priced at $150 with cro-moly rails and $250 with titanium rails. In addition to saddles, Rivet also offers handlebar tape, mudflaps, and other goods. I wish Deb all the best with the business, as well as in her cycling adventures.

Thursday, June 10, 2010

Fluttering About: the Papillionaire Sommer

Papillionaire Sommer

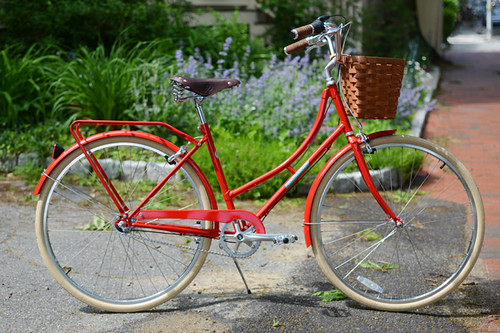
One of the newer members of the upright city bike club, the AustralianPapillionaire (a sponsor of this blog) has recently opened its doors in the USA and sent me a bicycle to try - their step-through Sommer model in the aptly named "Boston" colour scheme. Based on a traditional European loop-frame design and available in a range of candy colours, the lugged steel Sommer also comes with an attractive price tag - starting at $429 for a basic single speed bicycle, including fenders, chainguard and rear rack.
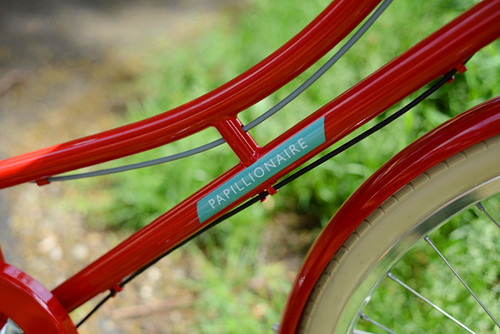


Papillionaire Sommer

Founded in by a brother and sister team in Melbourne,the Papillionaire name is based on the Latin word for butterfly (papillio)- reflecting their philosophy that "riding should be easy and fun and of course look good at the same time."
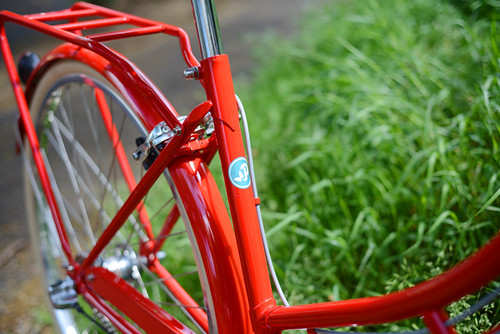


Papillionaire Sommer

The bicycle frames are designed at Papillionaire's Australian office and manufactured in Taiwan to their specs, along with the rear racks, and custom leather grips and saddles. The finish is powdercoat.The stated weight of the complete bike is 29lb.
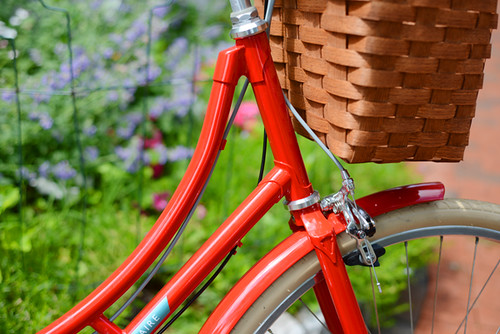


Papillionaire Sommer

The cro-moly frames are lugged and the fork features an attractive crown with cutout detail.
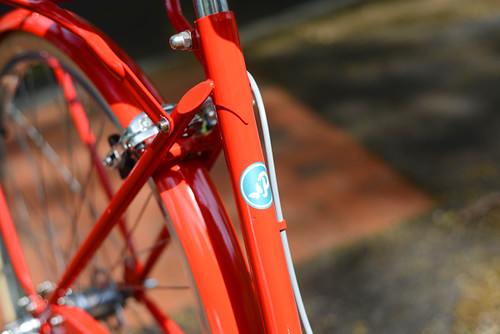


Papillionaire Sommer
Here is a look at the seat cluster.


Papillionaire Sommer

And the junction of the curved top tube with the seat tube.


Papillionaire Sommer
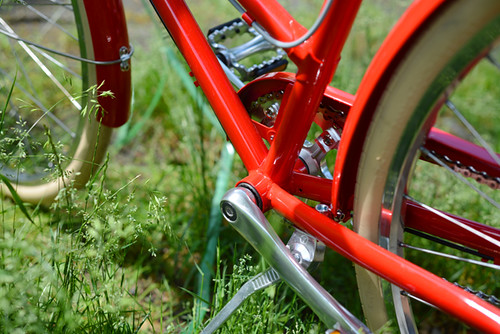
The bottom bracket is the only lugless joint on the frame, and it is done smoothly.


Papillionaire Sommer

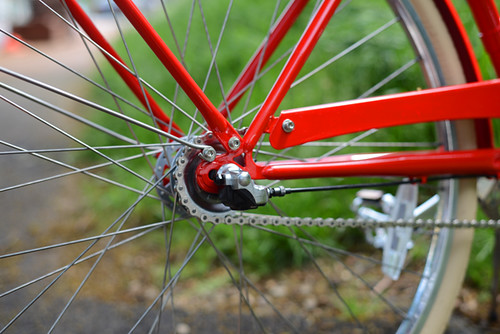
The horizontal dropouts in the rear accommodate hub gearing and incorporate braze-ons for rack mounts, fender mounts and chainguard bracket.


Papillionaire Sommer

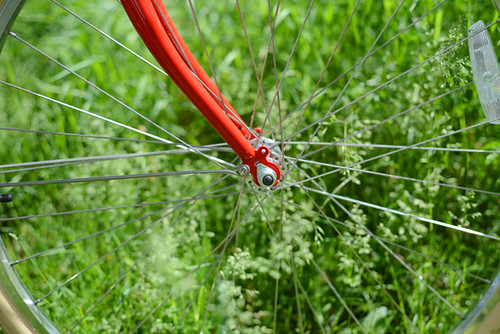
Braze-ons for both fenders and front rack on the fork dropouts as well.


Papillionaire Sommer

The Sommer comes in two sizes: standard and small.Aside from the curved top tube, a main distinguishing feature of this model is its handlebars: Somewhere between North Roads and Apehanger on the upright spectrum, the bars have quite a rise to them. This has the interesting visual effect of making the rest of the bike appear miniature, almost toy-like in comparison. In fact the bike is normal sized, with 700C wheels to boot - it's just that the handlebars are quite massive - intended, in combination with a short top tube, to achieve a super-upright riding position.


Papillionaire Sommer

View of the bars from the rider's perspective.


Papillionaire Sommer
And a side view of the rise. Note that the stem here is shown lowered to maximum capacity.


Papillionaire Sommer

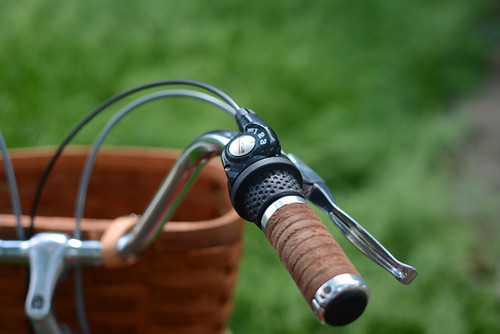
The test bike I received was set up as a 3-speed, with a Shimano Nexus hub and twist shifter, front and rear caliper brakes,


Papillionaire Sommer

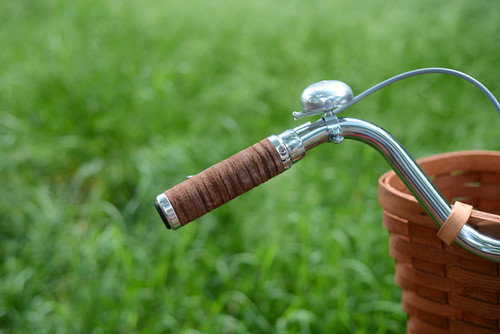
Papillionaire's leather grips (a copy of the Brooks version, it seems), a silver bell,


Papillionaire Sommer

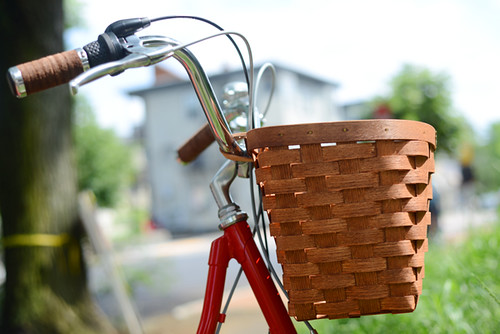
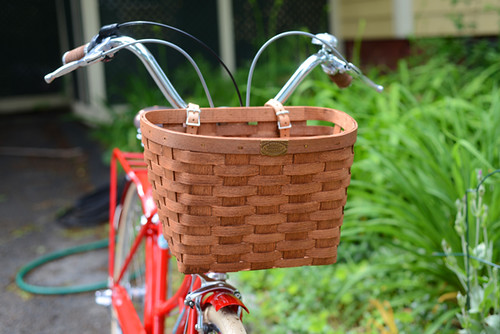
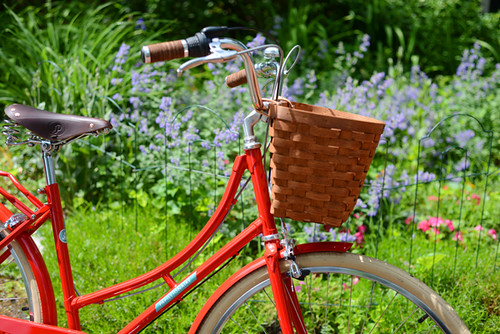
a Peterboro front basket (big enough to fit a handbag or similar),


Papillionaire Sommer

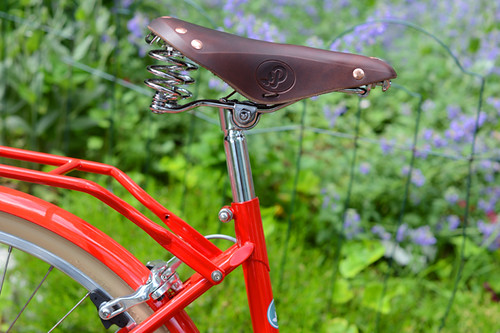
and a sprung leather saddle (looks to be Gyes-made), embossed with Papillionaire's logo. Note that the saddle here is shown sitting pretty far forward, with the clamp not allowing further backward movement. A setback seatpost is now available to get the saddle a bit further back.



Papillionaire Sommer

The Sommer's rear rack is rated for 18kg (40lb) of weight. No lighting is included with the bike, but the rear fender is drilled for a tail light, and a rear reflector is included. The fenders, rack and chainguard are all powder-coated to match the bicycle's frame.


Papillionaire Sommer
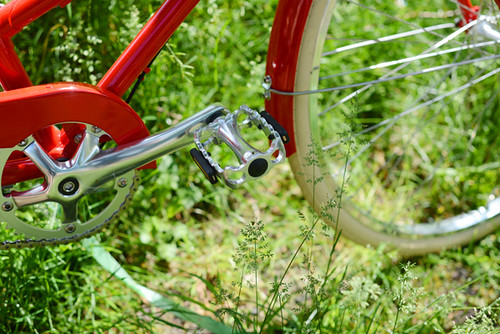
The alloy touring-stlye pedals come with reflectors.


Papillionaire Sommer

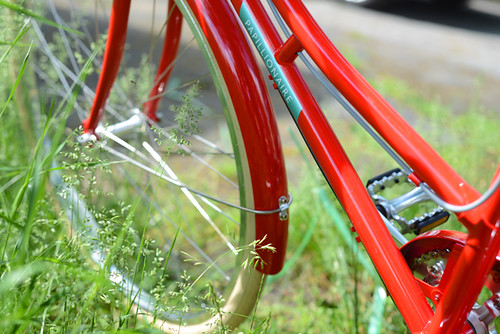
The 700Cx35mm Kenda West city tires are available in gumwall or cream.


Papillionaire Sommer

The Papillionaire was delivered to a nearby shop, the Bicycle Belle (read about it here), where I test rode it on a 4 mile urban loop simulating some of my usual local commutes.


Nothing about Papillionaire's branding suggests a focus on performance and speed, and so the bicycle's tame handling was consistent with my expectations. The Sommer is a bike for fluttering about town, not for "super commuting" 10 miles up hilly country roads. At the same time, the gearing is set quite low - so reasonable urban inclines are not difficult to tackle. And the roomy, integrated rear rack is a convenient standard feature, making it immediately possible to attach panniers, as well as rack-top bags and baskets to the bike.


On the whole, my impression of the Sommer was dominated by its bolt-upright positioning and tight "cockpit." Seated upon the saddle, my back was as straight as if I'd been sitting in a chair, and my hands gripped the handlebars just forward of my ribcage. The new setback seatpost alters these proportions, but only slightly: The Sommer was deliberately designed to be extremely upright. Those looking for that sort of fit will appreciate that, while those seeking a more leaned-forward, active position, may find the proportions limiting.
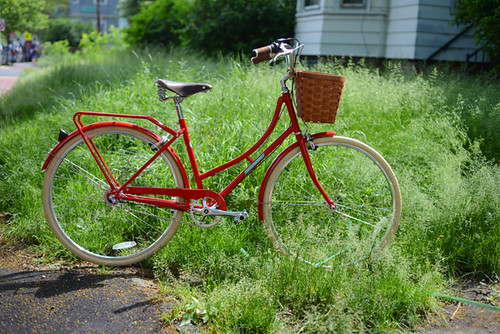


Papillionaire Sommer


Another notable feature of the Sommer is its very high bottom bracket. Those who enjoy being perched as high as possible on a city bike so as to "see above traffic" will appreciate this. Those who like to stop with a toe on the ground without getting off the saddle, may not: The high bottom bracket will make it difficult to set the saddle height to make this possible whilst achieving full leg extension on the downstroke when pedaling.


While Papillionaire refers to their bicycles as "Dutch-style," theSommer is not a typical Dutch Omafiets. They do have the upright positioning in common. But the Sommer's frame angles are not as relaxed and the fork is not as raked-out - giving it a more compact, less boat-like - and also less cushy - feel than that of a traditional Dutch bike. The Sommer's combination of tight frame, 700C wheels and wide tires also leaves very little toe clearance with the front wheel; some riders may experience toe overlap.


The 29lb stated weight figure feels pretty accurate; for a bike of its kind the Sommer is on the lightweight side. But note, that (to be fair, like most bikes in its price category) the Sommer does not come with lighting options - something I hope Papillionaire (and other manufacturers) will consider remedying, since the bike is intended for regular commuting.
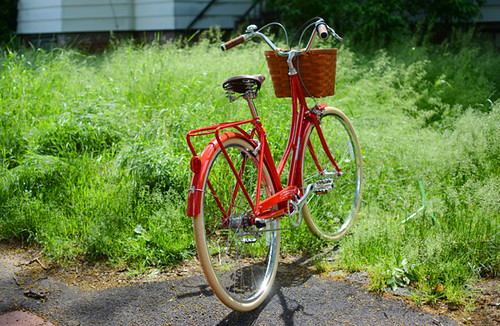


Papillionaire Sommer
Since Papillionaire expanded its market to the US, I'vereceived regular emails from readers asking how it compares to the popular Bobbin Birdie(see reviewhere).As far as apples-to-apples comparisons with other city bikes, I think this is a fair one: Like the Sommer, the Birdie isa Taiwan-made lugged cro-moly loop frame with hub gears, fenders, chainguard and rear rack, at a similar price point. As far as quality, I find the bikes equivalent - from the finish, to the components, to bike shop mechanics' feedback on the quality of the from-the-factory assembly. As far as frame design and ride feel, there are notable differences: The Sommer is a considerably more upright bike, and it is fitted with 700C wheels, whereas the Birdie is a 26" wheel bike with a position that (while still firmly in the upright category) is more aggressive, and to me feels more responsive. So the choice between the two will likely rest on the type of fit and ride quality a cyclist prefers. Go with Papillionaire if you want to be more upright and higher off the ground; with Bobbin if the reverse. Price-wise both are pretty good deals. I get so many inquiries from readers looking for new, but "vintage-style" upright bicycles at reasonable prices. It's great to have multiple options in the sub-$700 price range.


The Papillionaire Sommer as shown here (the 3-speed version, with leather accessories and basket) is priced at $629, and is available to test ride at the Bicycle Belle in Somerville, MA. Aside from the Sommer model, Papillionaire also offers a diamond frame and, most recently, a mixte. You can check out the specs and colours of all their modelshereand see the complete Sommer picture set here. Many thanks to Papilllionaire and Bicycle Belle for the opportunity to try this bike!